Covering Up
by Jonathan McGaha | 30 June 2015 12:00 am
Installed correctly, column covers are an aesthetics enhancer
 |
Column covers are a complementary design element that wrap around existing beams or structural columns to produce a superior finished look. To ensure their correct installation, they must be oriented correctly and erected plumb, level, square, true to line, and securely anchored in proper alignment and relationship to the input and work of other trades.
“For experienced craftsmen, installing column covers is a relatively easy procedure,” says Tripp Sandford, executive vice president, Móz Designs[1], Oakland, Calif. “Installing standard column covers is comparable to installing an art piece or hanging a picture on a wall. The technique is straightforward with typically little disruption to the interior. The components are relatively clean, light and easy to manage. Work with a manufacturer who specializes in architectural column covers and has comprehensive instructions on its website, offers technical assistance and shows a portfolio of projects.”
Before Installation
Before their installation, aluminum column covers should be stored in a clean dry place. Sandford advises that when there is a large number of covers to install, staging them outside would be advantageous. When stored outside, cover their carrying crates and ventilate them to minimize heat buildup.
When removing column covers from crates, don’t slide or drag them. Their correct packaging and material handling will protect their finish throughout installation. Ensure they are free from dents, scratches and other defects. These units can cost up to
$10,000 each, so damage during any stage of installation must be avoided. A successful field check is an important column cover pre-installation step. This involves determining the actual internal clearances so the enclosure will be large enough to provide clearances for all internal supports and services.
“The most frequent challenge we encounter involves clearances and tolerances,” says Steve Scharr, co-owner and director of business development at Metalwërks[2], Kennette Square, Pa. “For example, when the architect designs for a 24-inch diameter column cover with 2-inch-deep recessed reveals at top and bottom a 20-inch clearance is required. There may be a clearance problem because they have mechanical, electrical and plumbing (MEP) piping and conduits running inside the enclosure that interfere with that 20-inch space. We will provide templates for the actual space that the column cover occupies to be sent to the field to establish a
‘no-fly zone’ for other trades. This is usually best managed during design/shop drawing stage but is often not. Check for finished ceiling elevation prior to starting installation.”
 |
| Photo provided by Metalwërks, courtesy of Jim Greipp, Pau Hana Productions |
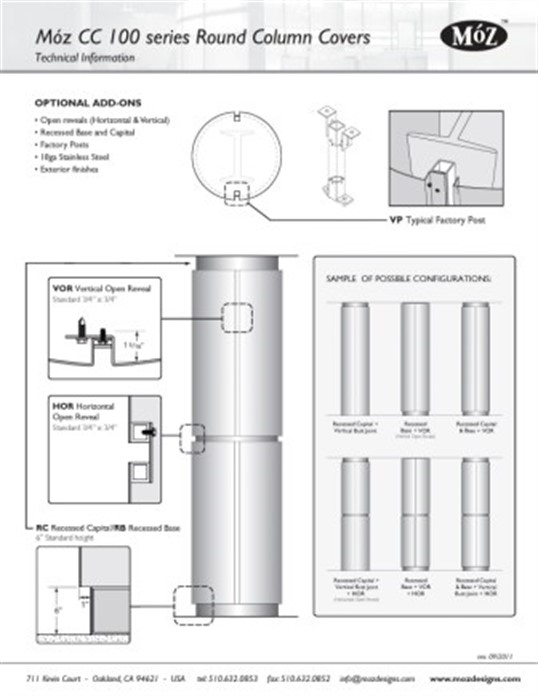
To ease pre-installation, many column cover manufacturers have a request-for-quote form on their website. Here, installers can input such important information as: the minimum clearance dimensions around the existing column; the finished floor-to-ceiling heights; the desired column diameter; any reveal, base or capital options; and the choice of materials, shape, color, pattern and finish.
Column Installation
Most manufacturers deliver column covers preformed and finished, and ready to install in accordance with their shop drawings and installation instructions. While installation procedures may vary, according to Scharr the following procedure ensures success.
 |
| Photo provided by Metalwërks, courtesy of Jim Greipp, Pau Hana Productions |
• Align joints to proper orientation. Mark locations of vertical joints and horizontal joints on the floor and on structural columns to be enclosed for framing alignment.
• Protect adjacent materials. Lay down protective layer of a carpet or other materials to protect flooring, catch drillings/cutoffs and tape off ceilings to avoid damage.
• Install framing clips at joint locations. This is particularly important when there is fireproofing to be applied to the steel. The fireproofing can then be applied over the clips and the column cover installer can come back and attach the continuous framing members to the clips without disturbing fireproofing.
• Install framing members true and plumb. Pre-locate keyhole pins on framing members with a shop-produced template.
• Install reveal sections hard to framing. In Metalwërks’ designs, the reveals are shipped loose and float inside the column cover to take up any tolerances.
• Install column cover panels over key-slot pins. The final step is usually the most efficient if the above steps are properly followed.
Sandford contends most column cover installations for I-beams, concrete or wood columns are essentially the same. He believes it all starts with the mounting posts-manufacturers will often supply tubular steel posts with adjustable mounting brackets for this purpose-via the following steps:
• First, position and anchor the mounting posts. A standard column attachment system requires the installation of floor-to-ceiling mounting posts or metal studs that are independent of the existing column structure. The anchors should mount to floors, beams or walls, and should be plated, galvanized or stainless steel. The installer can also furnish his own common metal or wood studs.
• Second, attach the anchor side. The anchor side of a column cover includes a flange that attaches directly to the post with a mechanically fastened screw in a vertical butt joint. Once the anchor side is secured, the “drop side” of the column cover can be attached with a keyway system that slides into the anchor half and locks into place.
• Third, optional base or capital components can be attached to the mounting posts once the column covers are secured. No caulking is required for interior applications.
 |
| Photo provided by Metalwërks, courtesy of Jim Greipp, Pau Hana Productions |
“If the column is more than 12 feet tall, install subsequent column covers in segments, stacked to the desired height and indexed to the previous anchor segments,” Sandford adds. “Manufacturers will also provide additional bracing components as needed to stiffen the substructure and ensure solid mid-span bracings and connections. If an existing concrete column does not allow for the necessary diameter increase to accommodate the posts,
‘direct apply’ is an alternative. In this case, the manufacturer can furnish a thinner gauge aluminum enclosure for ‘direct apply’ over the existing concrete column. The existing concrete columns need to be cleaned (i.e., free of oil, dirt and loose debris) to allow for bonding with panel/construction adhesive.”
After Installation
After installation, remove any protective material and film from the column cover to prevent adhesive transfer. When exposed to ultraviolet light for lengthy periods of time, this film becomes difficult to remove. Clean all visible surfaces per American Architectural Manufacturers Association recommended standards and manufacturer recommendations.
Sidebar: In the Right Sequence
If the general contractor does not properly coordinate the trades, it is up to the installer to know things like:
• I need to make sure the column covers as designed will fit around all of the internal structures and MEP fixtures; appurtenance holes are pre-cut in factory.
• I need to get my clips installed prior to fireproofing.
• I want to get my base reveals and framing in before flooring starts. This is especially true if the finished floor is a wet applied terrazzo style material where thicknesses will vary.
• Ceilings: it is easier to install a column cover before the ceilings go in. Damage is less likely to occur.
Steve Scharr, co-owner and director of business development at Metalwërks, Kennette Square, Pa.
 |
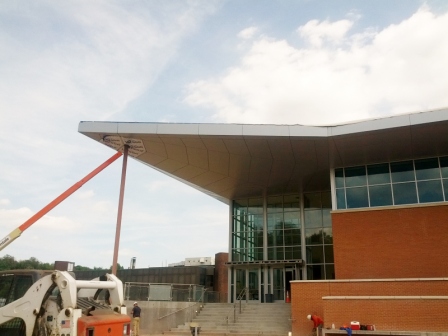
| Photo courtesy of Móz Designs |
- Móz Designs: http://mozdesigns.com
- Metalwërks: http://metalwerksusa.com
Source URL: https://www.metalconstructionnews.com/articles/covering-up/