Parapet Protection
by Mark Robins | 2 November 2020 12:00 am
Learn more about parapets so you don’t hit a wall
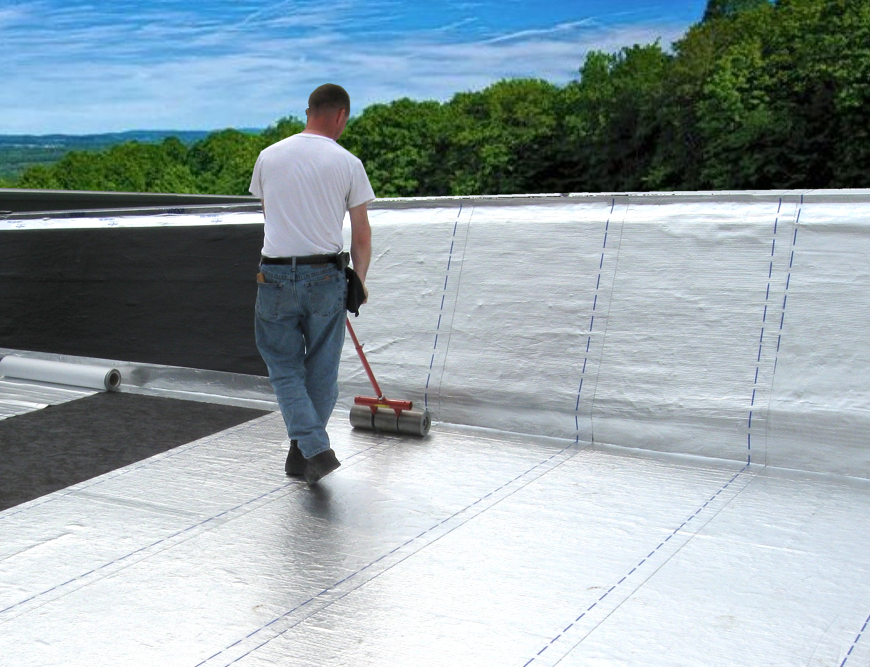
This parapet wall and low-slope roof deck were waterproofed using MFM Peel & Seal, a UV-stable membrane designed to be left exposed to the elements. The worker is rolling the surface to ensure maximum contact of the membrane to the substrate. (Photo courtesy of MFM Building Products Corp.)
Parapets were originally used as a battlement to defend fortified structures (like the iconic Alamo in San Antonio) from military attack. They’re even cited in the Bible (Deuteronomy 22:8) cautioning the Hebrews to build a parapet on their houses to prevent people from falling off. Today, they are still used as guard rails and serve many other functions. They can help impede the spread of fires by preventing flames from spreading upward, preventing fire from spreading from one building to another and acting as a barrier to radiant heat transfer.
Also, parapets protect the entire roof system from wind uplift forces by reducing air pressure differences at roof edges. They can modify heavy wind flow over a roof by evenly distributing it up, over and away from the roof edge. When designed in various shapes, they can create a decorative façade and can even improve a building’s proportions by increasing its apparent height. They can hide unsightly roofing materials including drains and vents, as well as rooftop equipment like AC units. Parapets can stop objects and debris from being blown onto roofs, and if the roof is being used as a public space or terrace, they prevent furniture, other objects and of course, people from falling off the roof. For roof edges and flashings, they provide a stable termination point.
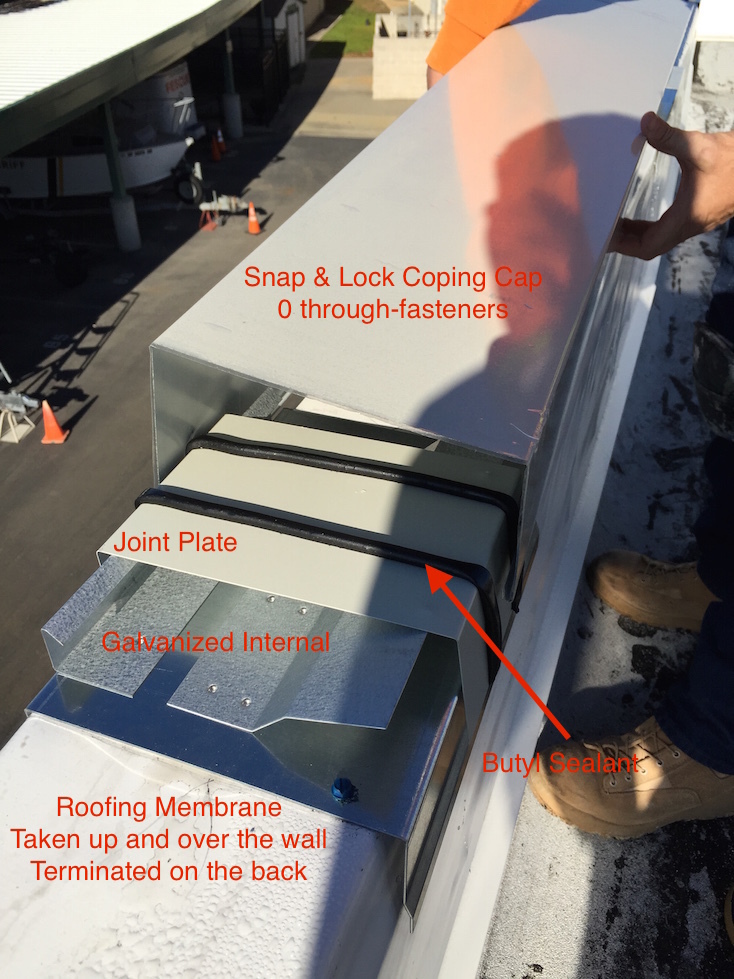
ANSI SPRI ES-1 compliant coping. (Photo courtesy of AEP Span)
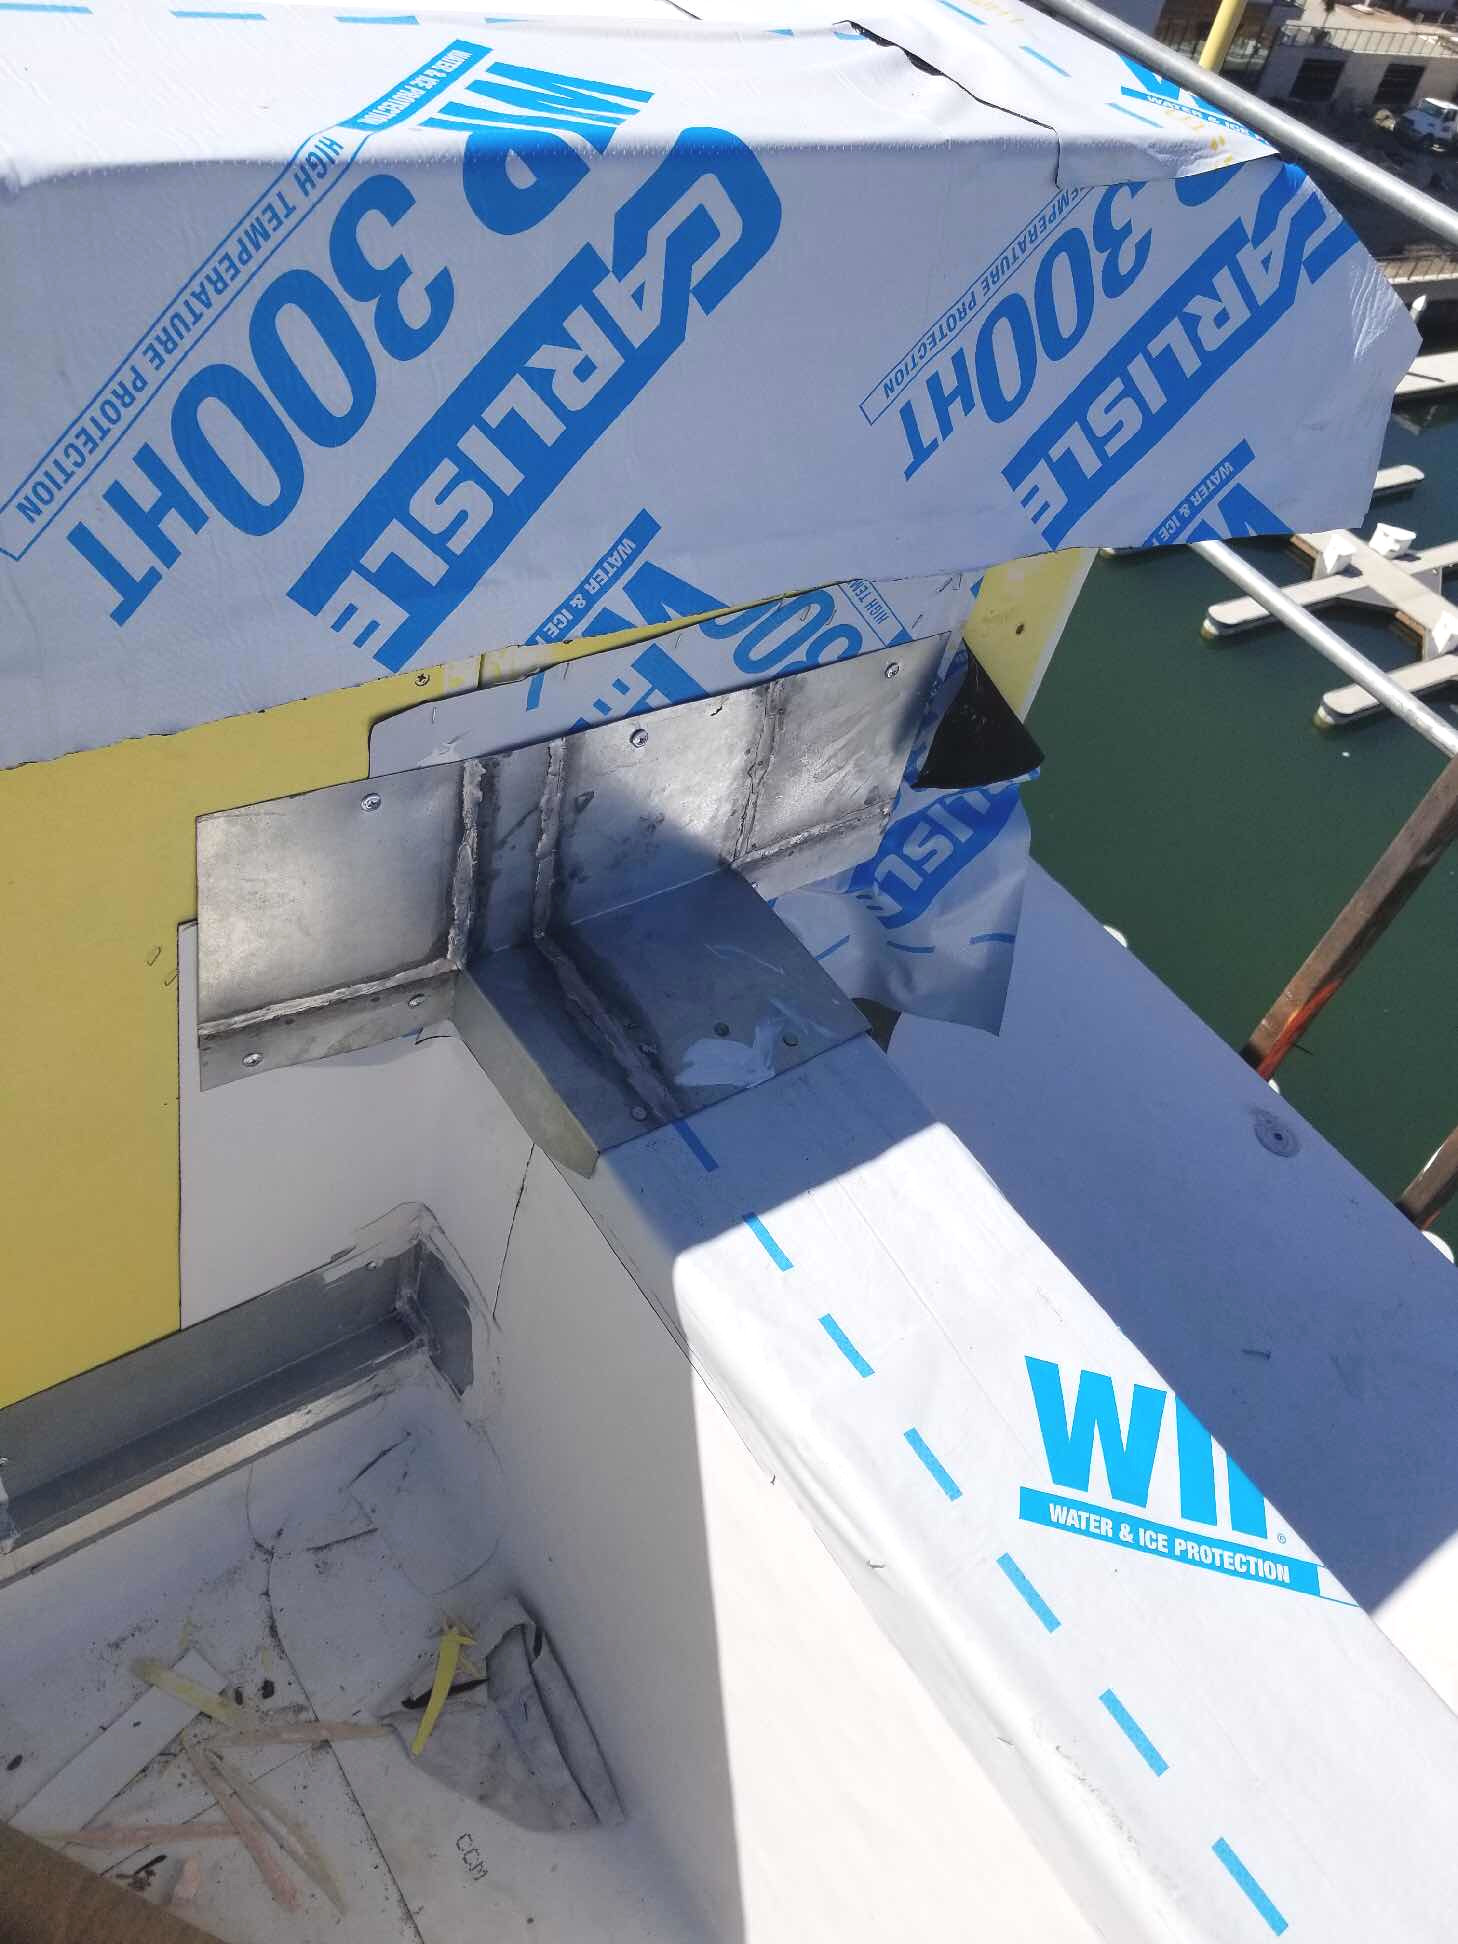
Coping transitions a parapet to a vertical wall. (Photo courtesy of OC Metals)
There are different types of parapet walls usually classified by their appearance. Plain parapet walls are easy to construct and are simple in their appearance. Perforated parapets are more artistic than the plain parapet and employ patterns of circles, trefoils, flower shapes and perforations for aesthetics. There are also (less frequently used today) embattled (used in castles and forts by arrow shooters) and paneled (ornamented on their outsides with designs) parapets. There are flat parapet walls (the most common), sloped parapet walls, stepped parapet walls (for inclined roof structures in stair-type design) and curved parapet walls (also called arched parapet walls).
Three-Side Exposure
Parapet walls are unique in that they are exposed to the elements on three sides giving them a much higher degree of failure (especially with water ingress) when compared to side walls or roof decks. The greatest potential for leaks is where the parapet wall meets the roof deck. When water runs off the parapet coping and onto the roof it must be directed off it with slope and crickets.
Water must not be allowed to collect and pond against a parapet wall where it could leak into a building’s interior. When water gets beneath a roof, it can cause bubbling, mold and rotting of the roof substrate. In a worst-case scenario, it could create a damp atmosphere within a building, making it unsafe to live and work in.
Glen Clapper, AIA, LEED AP, director, technical services, National Roofing Contractors Association[2], says most parapet walls fall into two types: barrier and drainage. “Ensuring details do not trap water in the parapet wall, particularly absorbent materials in a freeze-thaw environment, is of vital importance to maintaining a leak-free assembly and reducing the potential for parapet deterioration.”
A roof’s slope will have a big bearing on this. “Water drains off parapet walls quickly onto the roof since the cap is slanted onto the roofing system,” says Jeffrey Medeiros, architectural and design rep, AEP Span[3], West Sacramento, Calif. “You direct the runoff with slope contained in the roofing system and crickets to direct water toward the drains or scuppers.”
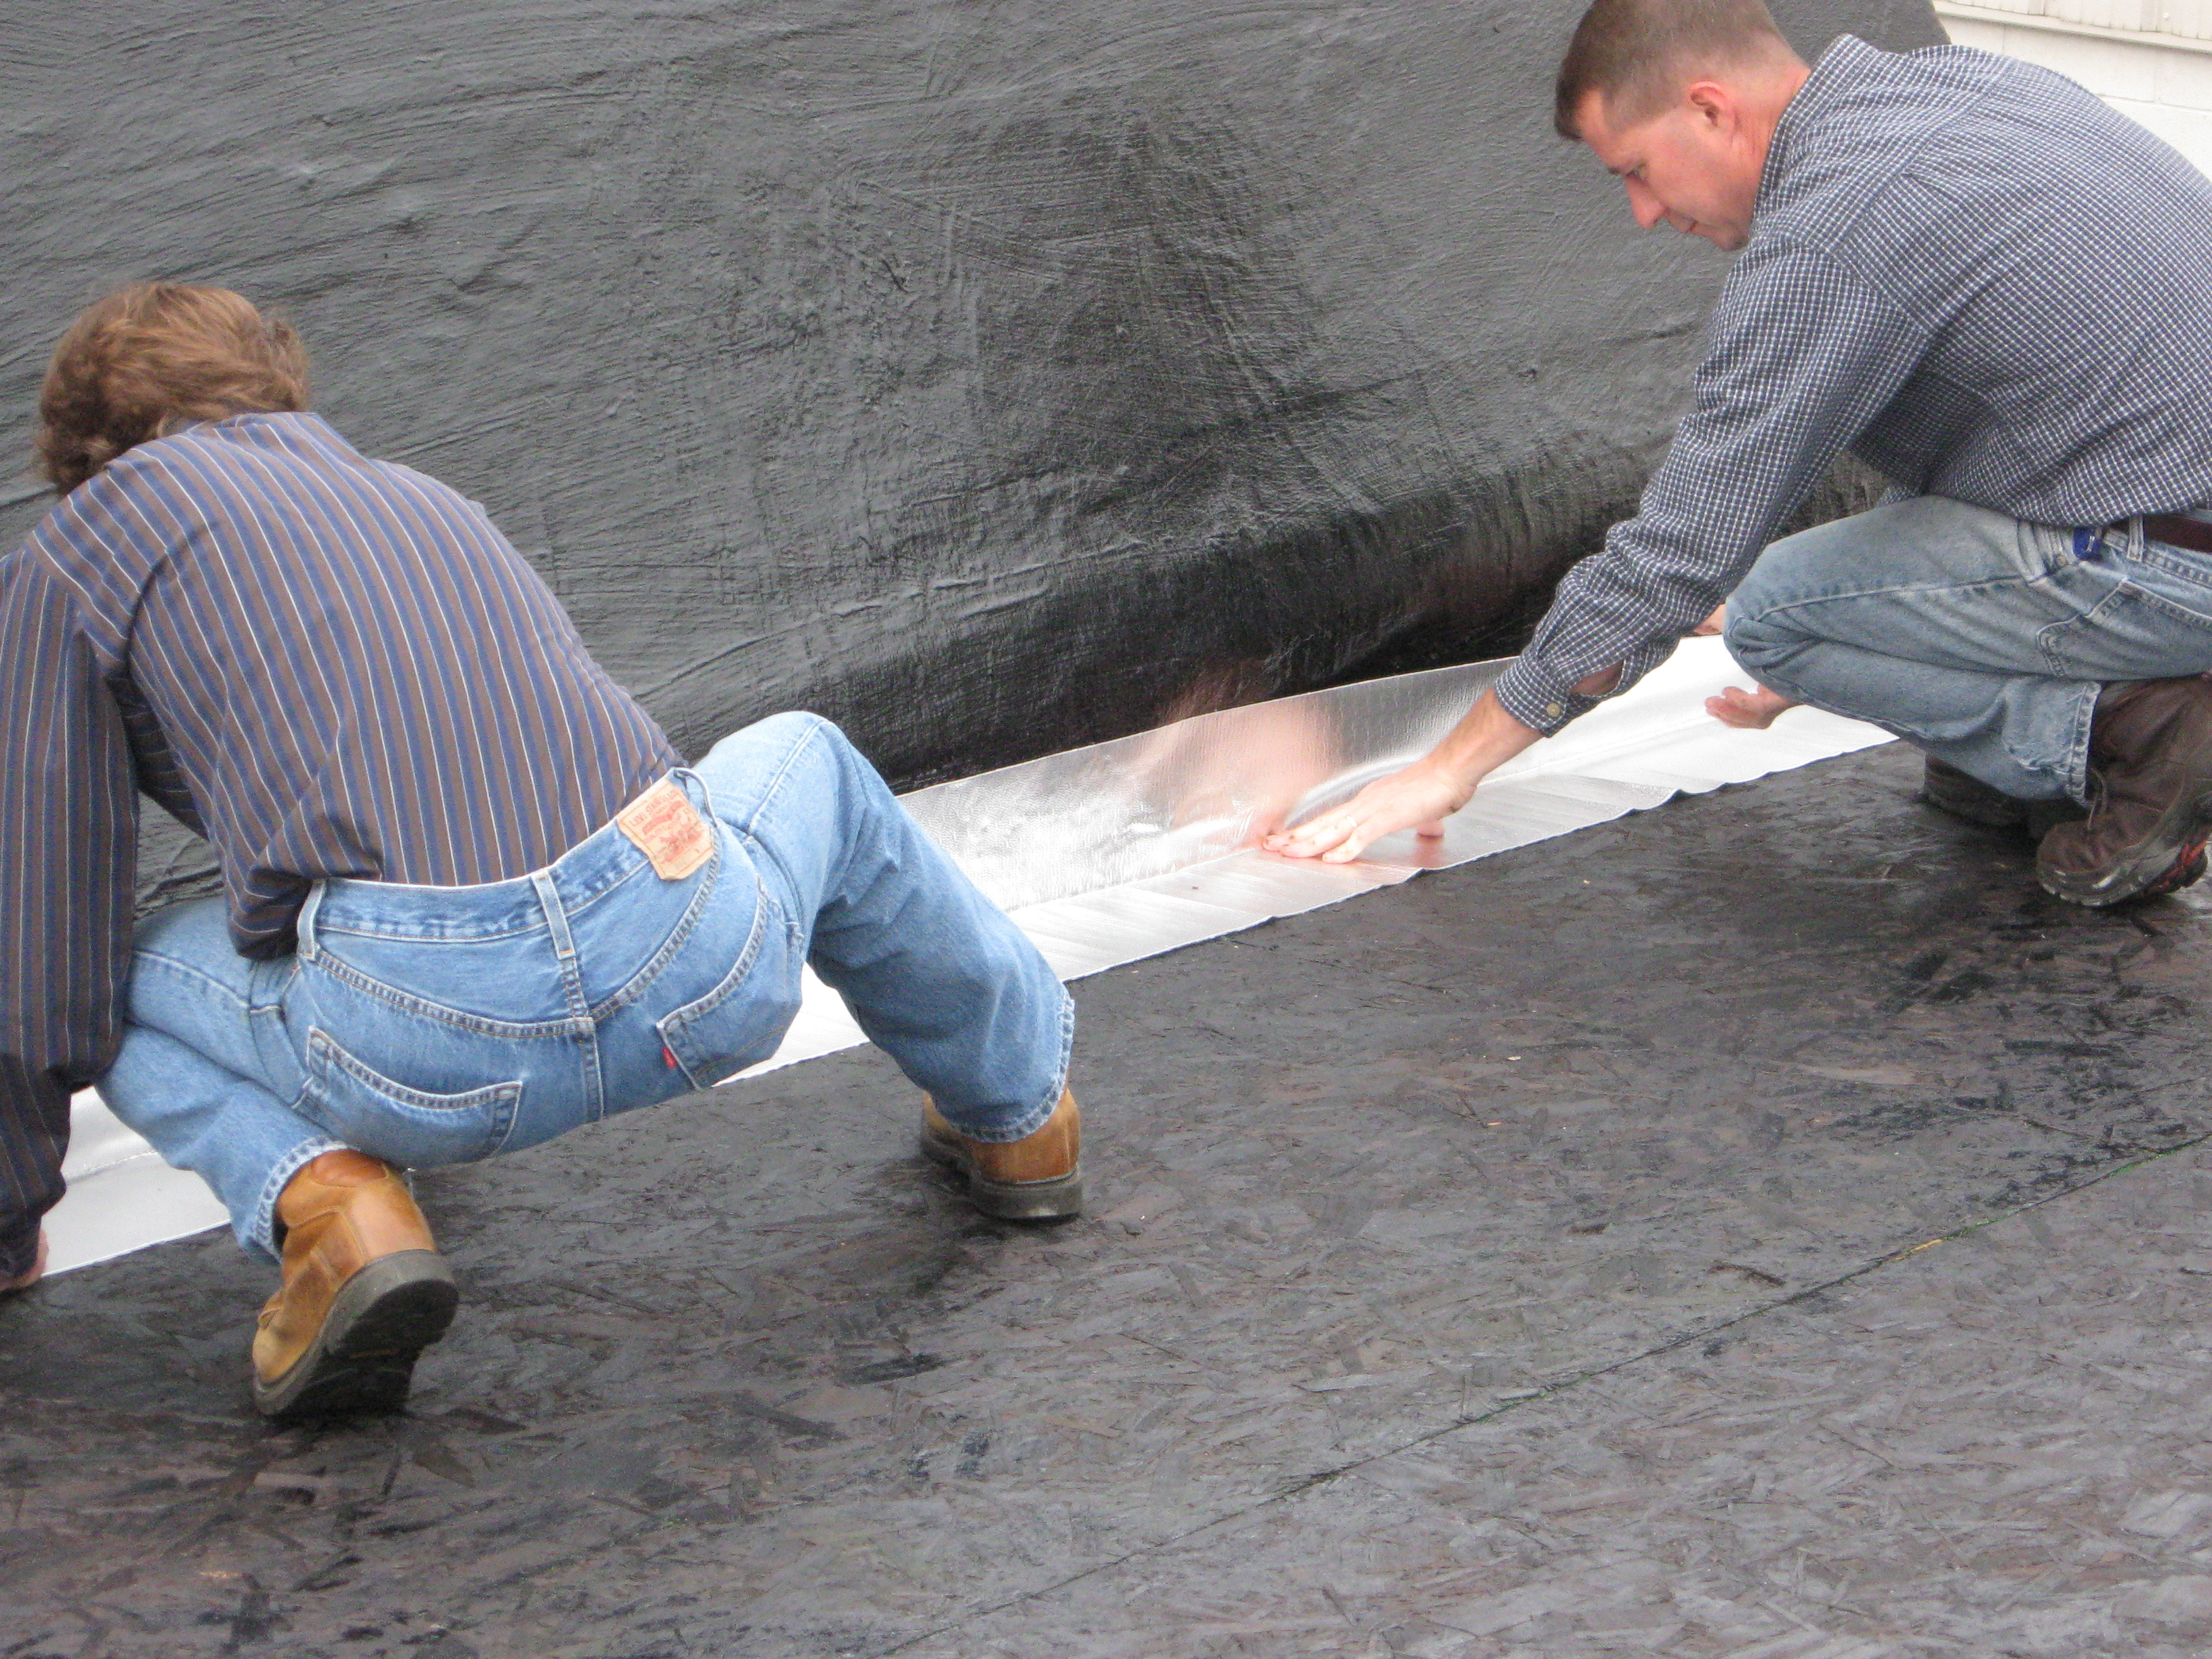
The parapet wall and roof deck have been primed and these workers are installing the 12-inch flashing piece at the transition point of the parapet wall to the roof deck. (Photo courtesy of MFM Building Products Corp.)
Clapper agrees, saying, “Proper slope/drainage must be provided away from the roof side of the parapet to interior roof drains or to parapet scuppers. Slope may be provided by the structural roof members or tapered insulation. In addition, flashings must be properly designed and installed at the parapet/roof interface. The top surface of parapets must be covered with a properly designed and installed coping.”
Waterproofing Parapets
Parapet flashing is made from sheet metal or copper, fabricated for a particular thickness of wall and may be shipped to the job site in sections. Proper flashing techniques extend parapet wall life and limit the chance of water leaking into the building.
When installed at the parapet/roof interface, Clapper explains, “The flashing material depends on the parapet material construction as well as the roof surface material, both of which must be compatible with the other. Generally, a base flashing will be required for the roof/parapet interface, in addition to a counterflashing.
Depending on the parapet wall construction, a through wall flashing may also be incorporated into the counterflashing configuration. [All of this is done] as required by the building code, manufacturer’s instructions and industry recommendations.” And, he cautions against using metal panels with proprietary cross-section profiles, which may pose flashing challenges without the use of compatible accessories (panel closure pieces, etc.).
Gene W. Summy, president of TLS Laboratories[6], Laguna Niguel, Calif., says the materials for parapet wall flashing, “may be either sheet materials or metal flashing, whatever the architect designs. The correct material should be a butyl-based membrane to allow for higher heat conditions and compatibility issues. If a metal cap is used, ensure all screws used have gaskets and are properly sealed. All seams should be sealed with a high-quality sealant with the sealant sandwiched between the two courses of metal. A final application of sealant should be tooled on top of the seam. Cover the entire seam with sealant. If the sealant cracks, it is the wrong material and/or applied too thin.”
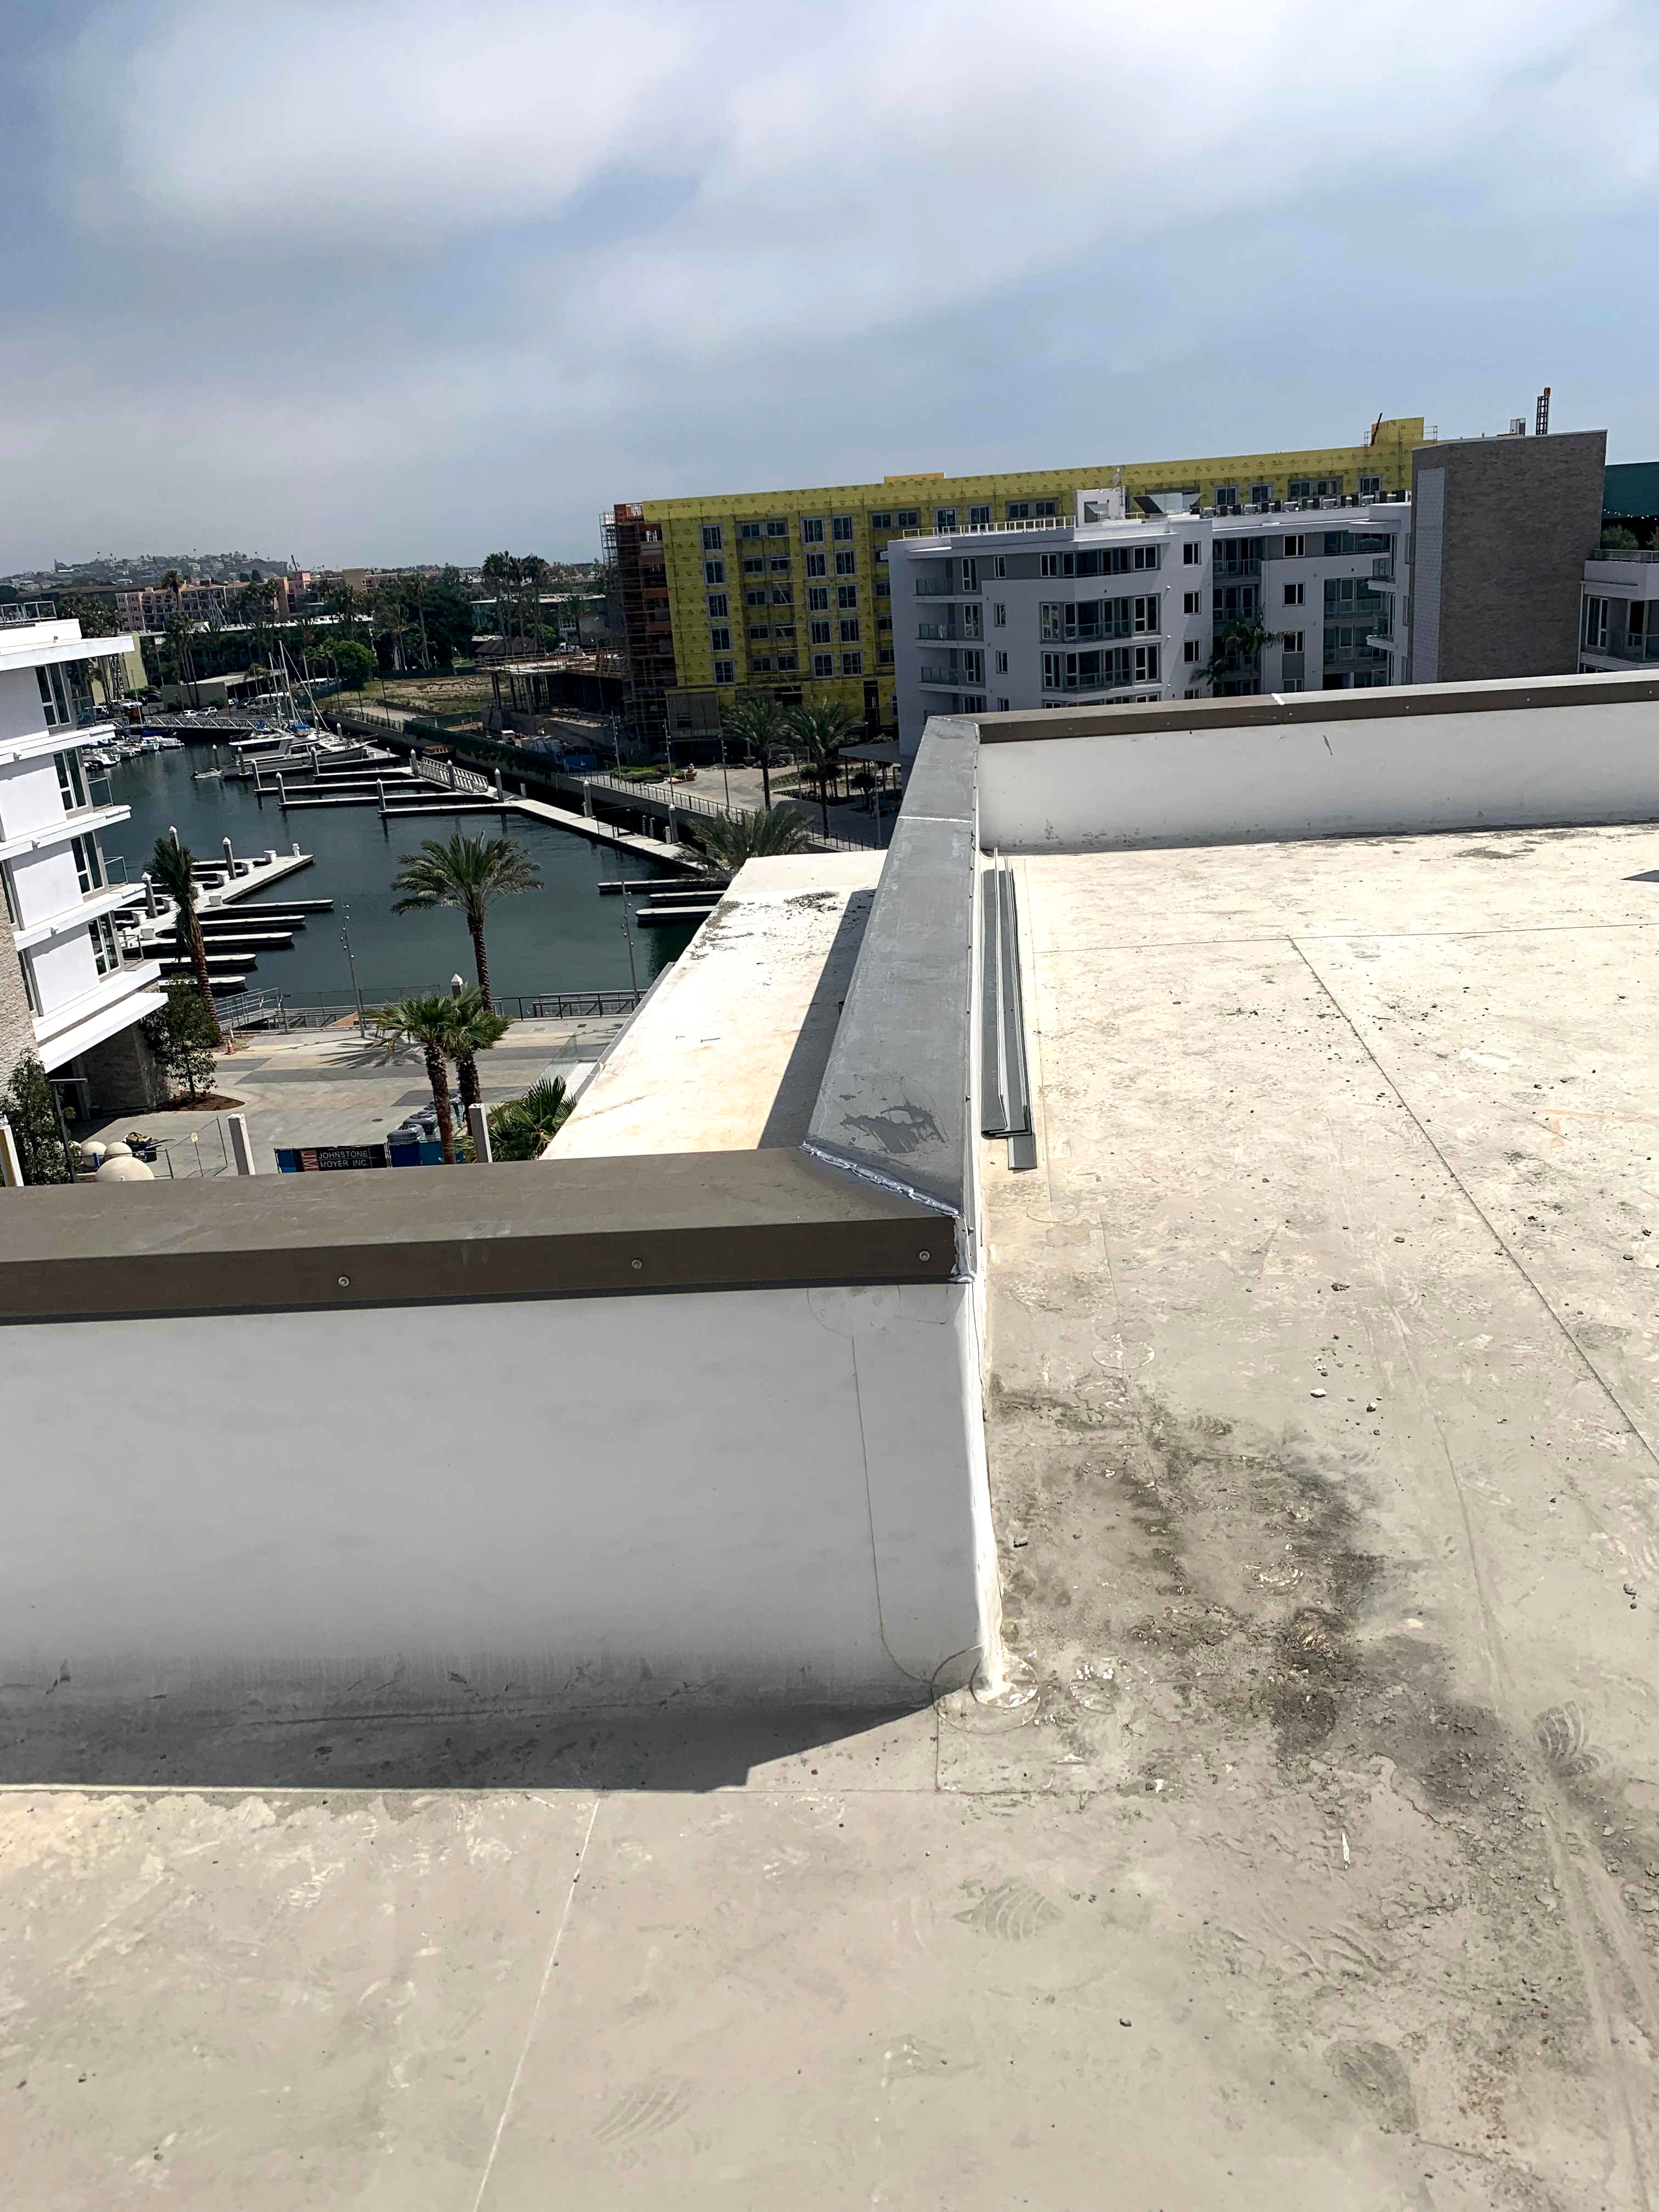
Coping transitions a parapet to a vertical wall. (Photo courtesy of OC Metals)
David Delcoma, product marketing manager, MFM Building Products Corp.[7], Coshocton, Ohio, gives the following advice when flashing a parapet wall:
• Starting where the parapet wall meets the roof deck, install a 12-inch piece of flashing membrane—half of the membrane up the parapet wall and the other half onto the roof deck—a 3/4-inch fillet along this intersection point of wall to roof will help with an easier transition from wall to roof deck.
• Install a full sheet, 36-inch-wide membrane, overtop the 12-inch section and extend up the vertical wall— if possible, wrap the sheet up and over the top cap section for best waterproofing practice—if the cap is un-removable, use a termination bar just under the cap to secure the membrane in place and finish with a bead of sealant along this leading edge.
• Always overlap membranes by a minimum of 3 inches to ensure a secure seal on overlaps—make sure that water flows over the lap and not against the lap (just like in roofing).
• We recommend priming all masonry and weathered surfaces to ensure the best bond of the membrane to the substrate.
• As with any self-adhering product, rolling the membrane with a hand roller ensures maximum contact of the membrane to the substrate—always pay special attention to all overlap areas.

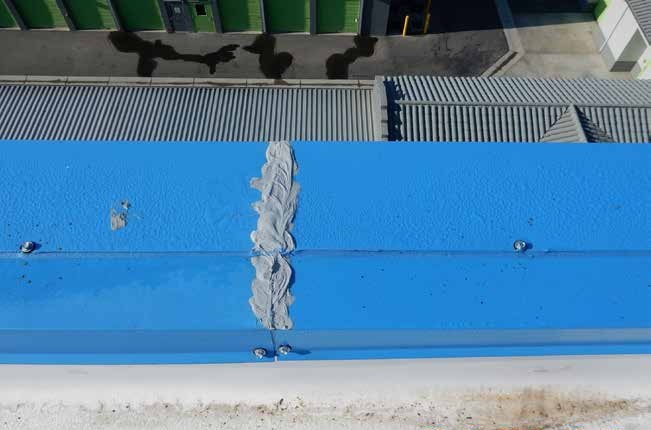
The above two images are examples of poor workmanship on metal caps on parapets. (Photo courtesy of TLS Laboratories)
Medeiros calls the waterproofing of parapet walls a “belt and suspenders” process and stresses the roofing system needs to be taken up and over the wall and terminated on the back side with a compression bar. “This alleviates the weight and provides a primary waterproofing barrier fully encapsulating the wall. The coping system is installed over that. Make sure to never fasten through the top of the coping system. Instead use a cleat and fasteners on the verticals. Fasteners will back-out over time due to thermocycling so you want to minimize this as much as possible with fasteners only on the interior roof side. Fasteners with neoprene washers must be used.”
Art Soto, project super at OC Metals[8], Santa Ana, Calif., stresses that with proper detailing and using experienced technicians, as well as trade coordination between framer, roofer, sheet metal tech and lather, many parapet waterproofing errors can be avoided.
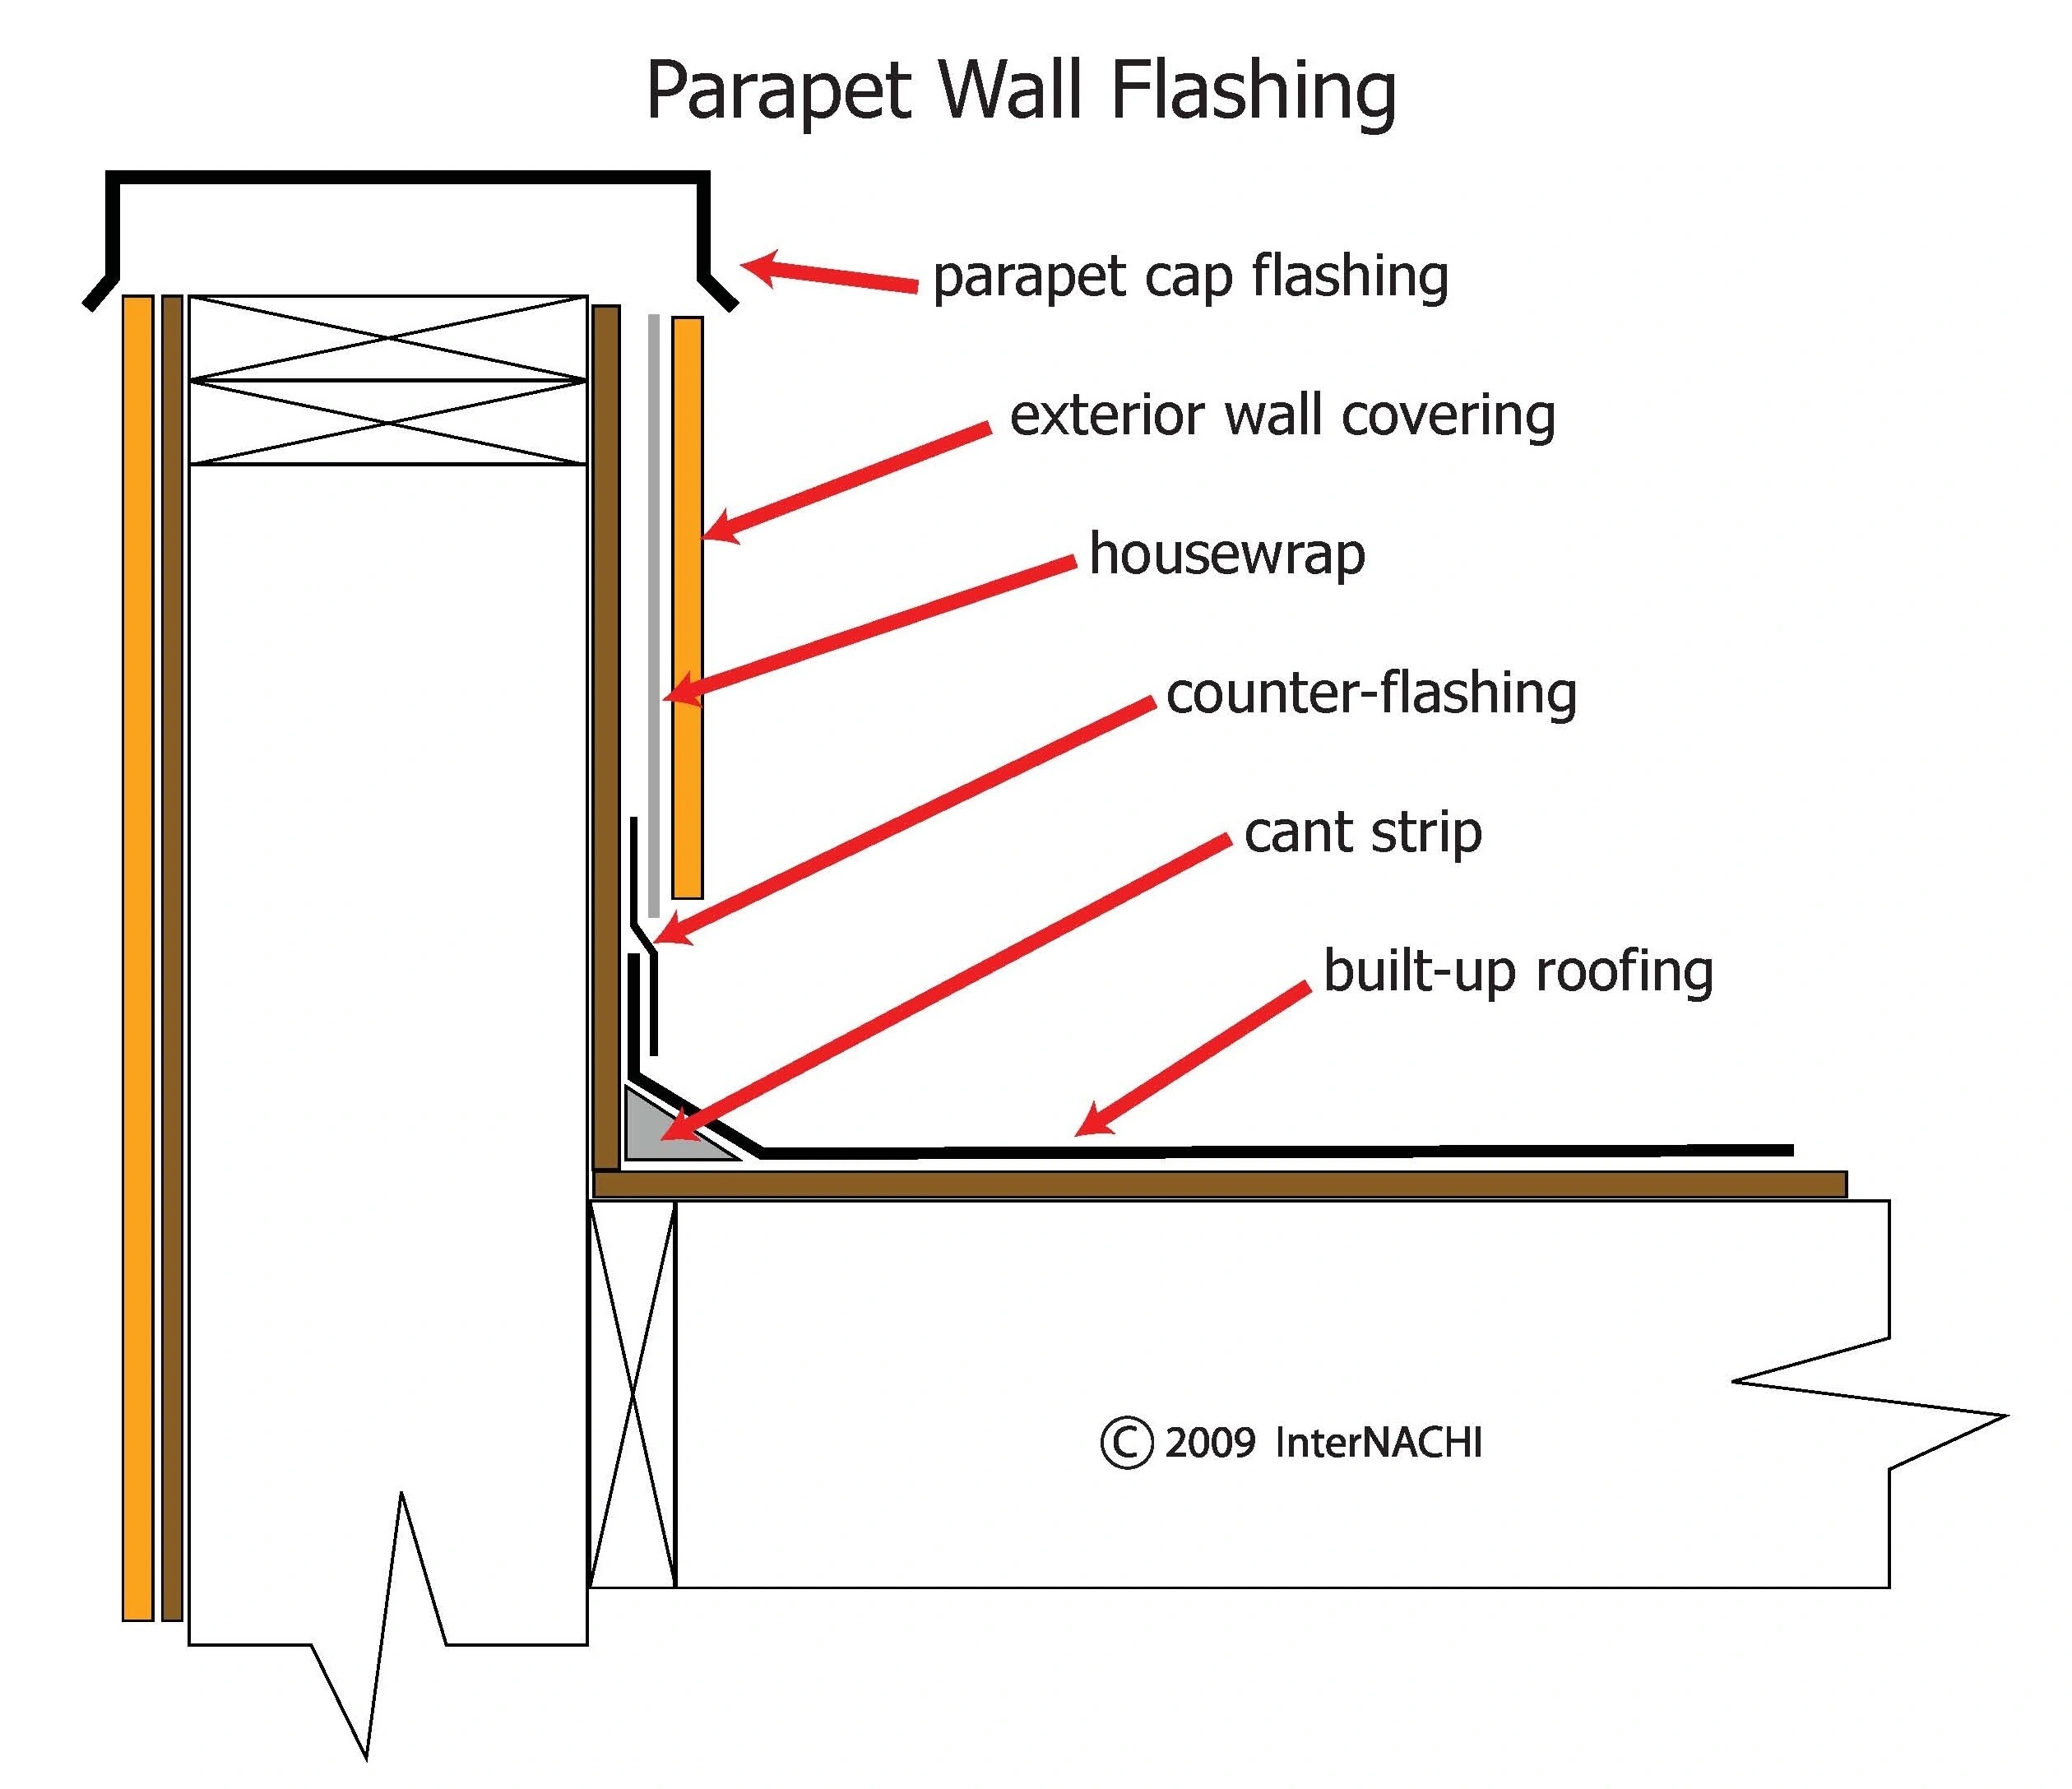
Parapet termination, underneath metal coping (Photo courtesy of InterNACHI)
- AEP Span: http://www.aepspan.com
- National Roofing Contractors Association: http://www.nrca.net
- AEP Span: http://www.aepspan.com/
- MFM Building Products Corp: http://www.mfmbp.com/
- Wagner Roofing Co.: http://wagnerroofing.com/
- TLS Laboratories: http://www.tlslabs.com
- MFM Building Products Corp.: http://www.mfmbp.com
- OC Metals: http://www.ocmetals.com/
Source URL: https://www.metalconstructionnews.com/articles/parapet-protection/