The following tips aid in successful single-skin installation
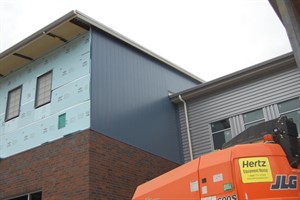
 |
| Photo courtesy of AEP Span |
A single-skin profile wall panel system hangs from a building’s frame as exterior cladding. Typically consisting of a single layer of prefinished steel or aluminum, copper or zinc, it is preformed or rollformed to a specific profile or shape. Most single-skin panels can be installed vertically and/or horizontally in numerous applications. Their clean, smooth, crisp lines on exterior walls give a sleek, contemporary look to any structure.
Single-skin panels can be installed in less time with less cost than other metal panel systems. Compared to other metal wall panel types, their lighter weight makes them easy to handle and install. Single-skin panels are more flexible and often allow for slight installation adjustments to keep panel installation on module or cover modest substrate inconsistencies. Here are some best practices to ensure their correct installation.
Best Practice: Anticipate and Prepare
Many common single-skin errors can be prevented by a single word: preparation. “Before you begin any single-skin installation project, review all the details to ensure you have taken into consideration all trim and flashing details, don’t forget about aesthetics,” says Doug McIntyre, director of research and business development, SECO Architectural Systems Inc., Snellville, Ga. “Look for areas where water could penetrate the building envelope. Review with an engineer, structural loads, fasteners and substrates to make sure you have the proper materials for the project. Anticipate how the system will perform and save yourself problems in the future!”
Eamon Lyons, sales representative, AEP Span, Fontana, Calif., agrees that there is no substitute for preparation. “It is a key factor in ensuring that projects go well and are completed in a professional manner,” he says. “Steel is warranted for a minimum of 20 years in most cases. Realize that just like a good project installation will stand the test of time, a poor one will cause a lifetime of issues for the project.”
Best Practice: Plumb and Level
 |
| Photo courtesy of SECO Architectural Systems Inc. |
As with any wall panel product, an obvious best practice is to ensure the panels are correctly shimmed, and installed plumb and level. “Any qualified installer should understand and have the ability to ensure that this is taken care of,” stresses Mike Wallace, president of Quality Metalcrafts LLC, Rogers, Minn. “The reality is that no matter what type of panel system you are installing, if the installer does not take the proper precautions to install the panel properly, they could take the best of panels where the product would be look disastrous on the building envelope.”
Over the past decades, advances in technology, engineering practices and materials have helped achieve a more plumb and level single-skin panel orientation. “Where once we used string lines to create straight and level surfaces, today we use different types of lasers,” McIntyre says. “Use lasers when laying out your work to expedite the process and to ensure a straight and level installation. Field dimensions were once taken with tape measures. Today we’re using 3-D scanning. Each new day we find our industry evolving, and with it comes a better understanding of the materials being installed, tools needed and a basic understanding of the installation process so that errors can be avoided and the finished product will withstand the test of time.”
Best Practice: Tools
When installing single-skin panels, using the correct tools in the correct way will not only ensure a quality installation, it will also reduce the amount of labor and time required to complete a particular project. “Some of the proper tools include corded or cordless drills with the proper size nut drivers,” says McIntyre. “Don’t use a 2-inch nut driver in a 3-inch gap; you’re going to damage the painted finish of the material. Use hand breaks when field folding large material. Using flat bars, hammers and pliers will not give the owner or architect the aesthetic look they were planning on. Use electric shears in lieu of tin snips to accelerate cutting operations. Make sure your squares and levels are not damaged so they provide you with accurate information. Include those tools that would be required in the event you have to do some field fabrication.”
For correct torque screw installation, Lyons stresses that using clutch screw guns is critical⎯and not impact drivers⎯which he says actually micro fracture fasteners. Impact drivers can lead to early and potentially critical failure in a structural application. Layout and preparation tables are key in ensuring accurate transfer of measurements for panel cuts and enabling predrilling. “Predrilling ensures consistent screw patterns and no eye sores,” he adds. “Levels, string lines and platform/bucket equipment to ensure correct access are all critical factors of required tools to ensure the best possible outcome.”
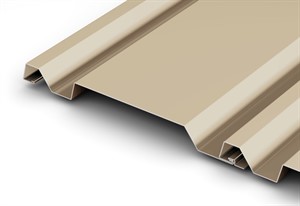
Best Practice: Fasteners
 |
| Photo courtesy of AEP Span |
Know the correct fastener spacing to meet the required wind loads. Don’t interchange fasteners for stitch sealing (panel to panel) and straight sealers (structural connections), or panel attachment stripping can occur. Over-torqued fasteners can result in destroyed washers. Under-torqued fasteners can result in ineffective compression seals that can leak. Lyons believes it is all too common to see inconsistent screws patterns and rows of fasteners that can detract from an otherwise great project. He cautions that swarth from drilling and screws that isn’t blown away and removed from the work surface will cause premature/rusting issues.
Best Practice: Laps
A common error with horizontal single-skin panel installation is the panel lap being installed in the wrong orientation, causing water intrusion issues. Also, “When there are long (panel) runs involved, end laps not aligned and out of level, the nesting/lapping of the panels will cause incorrect interlocking of laps,” says Lyons. “[This causes] water intrusion issues or ultimately an inadequate structural support condition because panel properties are not realized due to incorrect installation. One of the most overlooked items regardless of orientation is the butyl tape/sealant at the laps. This is a critical element that panels rely on for their air and water infiltration testing. Without it, many don’t perform as intended.”
Best Practice: Oil Canning
 |
| Photo courtesy of Petersen Aluminum Corp. |
Because single-skin wall panels are more flexible, they have a higher tendency to oil can, especially if the panel contains a wide flat area. Single-skin panels in a higher gauge⎯with striations or with minor ribs⎯have a lower tendency for oil canning. Rib panels may eliminate oil canning altogether. “The design of the wall should allow for expansion by shortening the length of the single-skin panels and installing proper expansion joints,” says Daniel Nicely, managing director at VMZINC-US and Umicore Building Products USA Inc., Raleigh, N.C. “Often, when full sunlight focuses on the panels, they heat up and thermal expansion takes place. The panels contract when the sunlight is no longer direct and the panel temperature drops. Once the panels go through a thermal expansion cycle, which should be one summer season, there should be less oil canning.”
John Pickford, president of Engineered Wall Systems Inc., South Salt Lake, Utah, suggests working with the customer to establish the correct gauge/thickness of the single-skin panel to provide an acceptable appearance. “Evaluate flashing dimensions and panel widths to see if a heavier gauge single-skin is appropriate to prevent oil canning,” he says. “Confirm in the field that the critical support locations are in the appropriate contract design locations and the supports are installed within tolerance prior to starting installation to minimize any undue oil canning and appearance issues in hard lighting.”
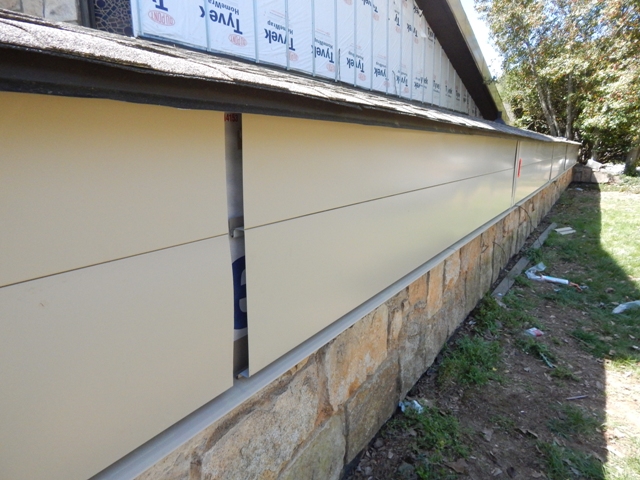
Best Practice: Shipping and Storage
Through-fastened, single-skin metal panels nest nicely and are easily shipped. If they are stored for an extended period of time they should be tarped to remain dry and clean. Strippable films must avoid direct sunlight.
Best Practice: Accordance
While single-skin metal panels may be slightly easier to install due to their reduced product complexity, they should still be installed under the direct supervision of an experienced installation contractor trained in their proper application. Downloadable, clear and concise installation guidelines from manufacturers identify correct procedures and practices. Install single-skin panels in accordance with these approved shop drawings and instructions, and in their indicated orientation, size and location. This helps ensure a correct and complete installation, free of defects and functioning as designed.
Sidebar: Errors and Prevention
John Pickford, president; Marc Ribar, project executive; and Steve Jones, sales and business development at Engineered Wall Systems Inc., South Salt Lake, Utah, provided the following single-skin metal panel installation error and prevention tips:
• Failure of installer to verify wind loads and validating fastener pattern is correct to meet the required loads.
• Missing the support structure behind the panels.
• Overdriving fasteners, which may strip the stud or overdrive the sealing washer.
• Examination of the substrates installed by others prior to beginning the panel installation.
• Removing carbon steel shavings after installation to prevent rust staining on substrate and panel surfaces.
• Failing to properly seal panel laps with either tape or gun butyl sealants.
• Failing to properly inspect air and water barrier for proper installation prior to panel installation.
• Failing to inspect penetrations through wall for proper sealing/fire caulking prior to panel installation.
• Failing to hold “module” when installing the panels-installer needs to layout the horizontal and vertical modules to prevent module creep (shrink or growth of proper module dimension) which would result in a non-level or not plumb installation.
• Stains on natural metals-Natural metals such as zinc and copper are prone to staining if improperly handled or improperly stored. They must be kept in a dry, well-ventilated and protected area. Handling should be done with cotton gloves to prevent transfer of skin oils that may stain the natural metal.
• Panel direction-Many Mica or metallic finishes are directional. Care must be taken to keep the panels in the same orientation to prevent color/tone appearance variation.
• Cutting of edges should always be done with a shearing type tool
(double cuts, unishear, nibbler, hand snips) to prevent burrs or defamation. Under no circumstances should abrasive blades be used to cut the material as it will damage the paint finish and underlying protective coatings on the material.
• Identify underlying support locations and carefully laying out the fastener patterns.
• Set the torque setting on the equipment to the proper setting for the application. This is critical if using self-drilling fasteners that may overrun and strip the structural supports.
• Proper torque setting will keep the sealing washers from overrunning and damaging the neoprene/rubber seal gasket.
• Allow for proper isolation of different metals to prevent galvanic corrosion.
 |
| Photo courtesy of SECO Architectural Systems Inc. |