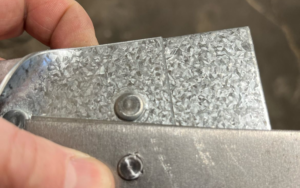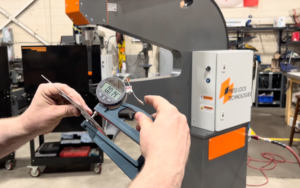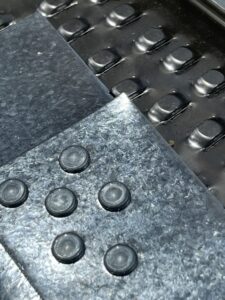
Sheet metal clinching offers a reliable and cost-effective method for joining metal parts without additional fasteners.
Like any complex machinery, clinching machines can encounter all kinds of issues disrupting production and compromising product quality.
Here’s a guide to troubleshooting the most common problems encountered with clinching machines. Typically, most people
run into problems with either the clinch joint’s integrity or the machinery.
We will cover how to:
• Avoid clinch joint failures and ensure joints are consistently strong and reliable.
• Activate the clinching machine, whether it is pneumatic or hydropneumatic. • Check why the machine might not be resetting or completing its cycle.
• Ensure the clinching mechanism has enough power and free movement.
• Keep the clinch tooling correctly aligned.
Issue #1: Clinch joint failure
Clinch joint failure can manifest in a couple of ways. These issues can compromise the integrity of the joint, meaning it will not actually hold the way intended.
A clinch joint can have a:
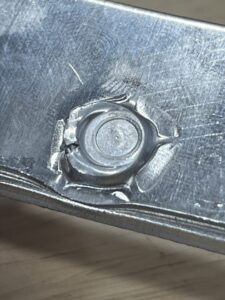
• Pop failure is where the clinch comes apart and leaves behind a dimple or a male and female part in the metal. The most common reason for this is the tooling choice or setting does not match the materials being worked with, so check if the die is deep enough or if the tooling squeeze adjustment
is squeezing enough to form the metal. It might also be caused by the clinching force
being too low.
• Shear failure occurs when the clinching tooling goes straight through the metal and leaves behind a hole. This can be caused by the die being too deep, the punch tip radius being too sharp, the clinching force being too high, the tooling squeeze setting being adjusted too far, or the material lacking the integrity it needs to hold a clinch joint.
Issue #2: The clinching machine will not activate

If the clinching machine does not activate, there is likely an issue with the system initiating the clinching mechanism.
For pneumatic machines, essentially, it needs to be ensured the air supply is active and reaches all the supply lines in the machine at a high enough pressure. The most common issues are caused by pinched air supply lines, sticky valves with debris in them, or plugged exhausts.
Two types of hydropneumatic systems could run into issues. One has the booster and cylinder all integrated as one piece. In this case, there is no hydraulic hose and controls or sensors directly tied to the fluid. The other has a pneumatically powered booster converting standard 90 psi shop air into hydraulic pressurized fluid. This fluid is transported to a cylinder. Typically, the booster/cylinder design is for portable tools to make the physical size of the tool smaller.
To ensure a hydropneumatic machine activates, there are three main areas to check:
1. Faulty connection. Ensure the connection from the booster to the cylinder is complete. In some cases, the cylinder hose connection has a quick connect using a spring-loaded ball to prevent leaks when the hose is disconnected for service. This ball needs to be compressed completely to allow oil to flow freely. If the ball is not compressed, the cylinder can get stuck in an extended or retracted position. Tighten the connection if it is a
screw-type or clean around it and reconnect to ensure proper linkage.
2. Too much air mixed with the oil. If there is too much air mixed with the oil, it can steal the volume of oil needed to move the cylinder. Some boosters like Jergens will make an audible click when the booster has traveled the complete distance, but not enough oil has moved to complete the cylinder’s full travel. Check the oil level and ensure there is enough oil in the system. Some systems self-bleed by cycling the machine, allowing air to escape. Ensure the oil line gradually ascends to the booster to facilitate air removal. It may be necessary to cycle the machine 20 or more times to agitate the air bubbles up and out
of the system.
3. Non-pressurized oil. If the oil cannot be pressurized, a seal might need replacing, and the booster or cylinder may need to be rebuilt. Again, a click may be heard when the booster travels full stroke and hits the end of travel. The pressure reading on the hydraulic gauge (if installed) rises slightly and then falls to 0 right after that click sound.
Issue #3: The clinching machine will not open up or reset
(for machines with a pressure switch)

When a clinching machine fails to open up or reset, air or oil leaks often prevent the pressure switch from receiving the correct signal.
The troubleshooting steps here are:
• Check the supply pressure. Ensure the pressure is adequate and reaches the power cylinder. A low supply pressure can prevent
the machine from completing its cycle.
• Check the integrity of all seals. There are seals at all points of connection in the system. If the seal is not doing the job, the pressure will not build up sufficiently to trigger the switch. Notably, air or oil should leak at the point of seal failure. Sometimes, this can be difficult to detect in a noisy shop. For air
leaks, spray some soapy water around suspect connections, and bubbles will form around air leaks. Be especially careful with hydraulic systems, as high-pressure oil leaks can cause serious injury without proper precautions. Inspect and replace seals as needed.
• Check the pressure settings. It is possible someone adjusted the switch to a higher than the required setting. Verify the pressure switch is set to the recommended setting. • Check the pressure switch and gauges. If the pressure switch or gauges are faulty, use an independent gauge to check if the actuator receives the correct pressure. Also, inspect the line that sends pressure from the actuator to the switch. Look for kinked or crimped lines blocking the flow.
• Check for sticky valves. Make sure all the valves are functional.
Issue #4: The clinching mechanism does not have enough power
Power issues can often be attributed to leaks in the pneumatic or hydraulic systems, so most of the tips are the same as above. Check the power supply and go through the whole system to ensure there are no leaks and all connections are as tight as they should be. It can sometimes be helpful to lower the
pressure to half, so the system operates a little slower and gives some time to observe any areas not performing correctly.
Issue #5: The clinch joint is not aligned

If the machine is running but the clinch joint looks misaligned, the guidance system guiding the die and punch together is likely to be to blame.
Check if the clinch tooling wobbles by taking hold of the tooling shaft and pushing and pulling the shaft a little on the machine itself. There must always be some movement. However, excessive movement can lead to poor alignment, typically caused by a loose bolt.
Check for any mechanical blockages stopping the clinch tooling from full travel. If increasing the power slightly does not allow the system to complete the cycle, mechanical interference can be a suspect. Listen for unusual sounds during operation to detect these blockages.
Systematically going through each of these steps is a great starting point to ensure clinching machines are always working smoothly. But keep in mind, regular maintenance and proactive checks are key to preventing these problems from occurring in the first place.
Byron Selorme, owner and president of Press Lock Technologies has more than 25 years of experience in the clinching industry and is a former director of engineering at Norlok, Selorme brings unparalleled expertise to the field of sheet metal clinching. He is dedicated to advancing metal fabrication techniques and providing valuable insights to shop owners and fabricators.

