Many standing seam roof (SSR) systems require mechanical field seaming to meet the weathertightness and structural performance requirements of the roof system.
The most important step affecting your standing seam roof performance
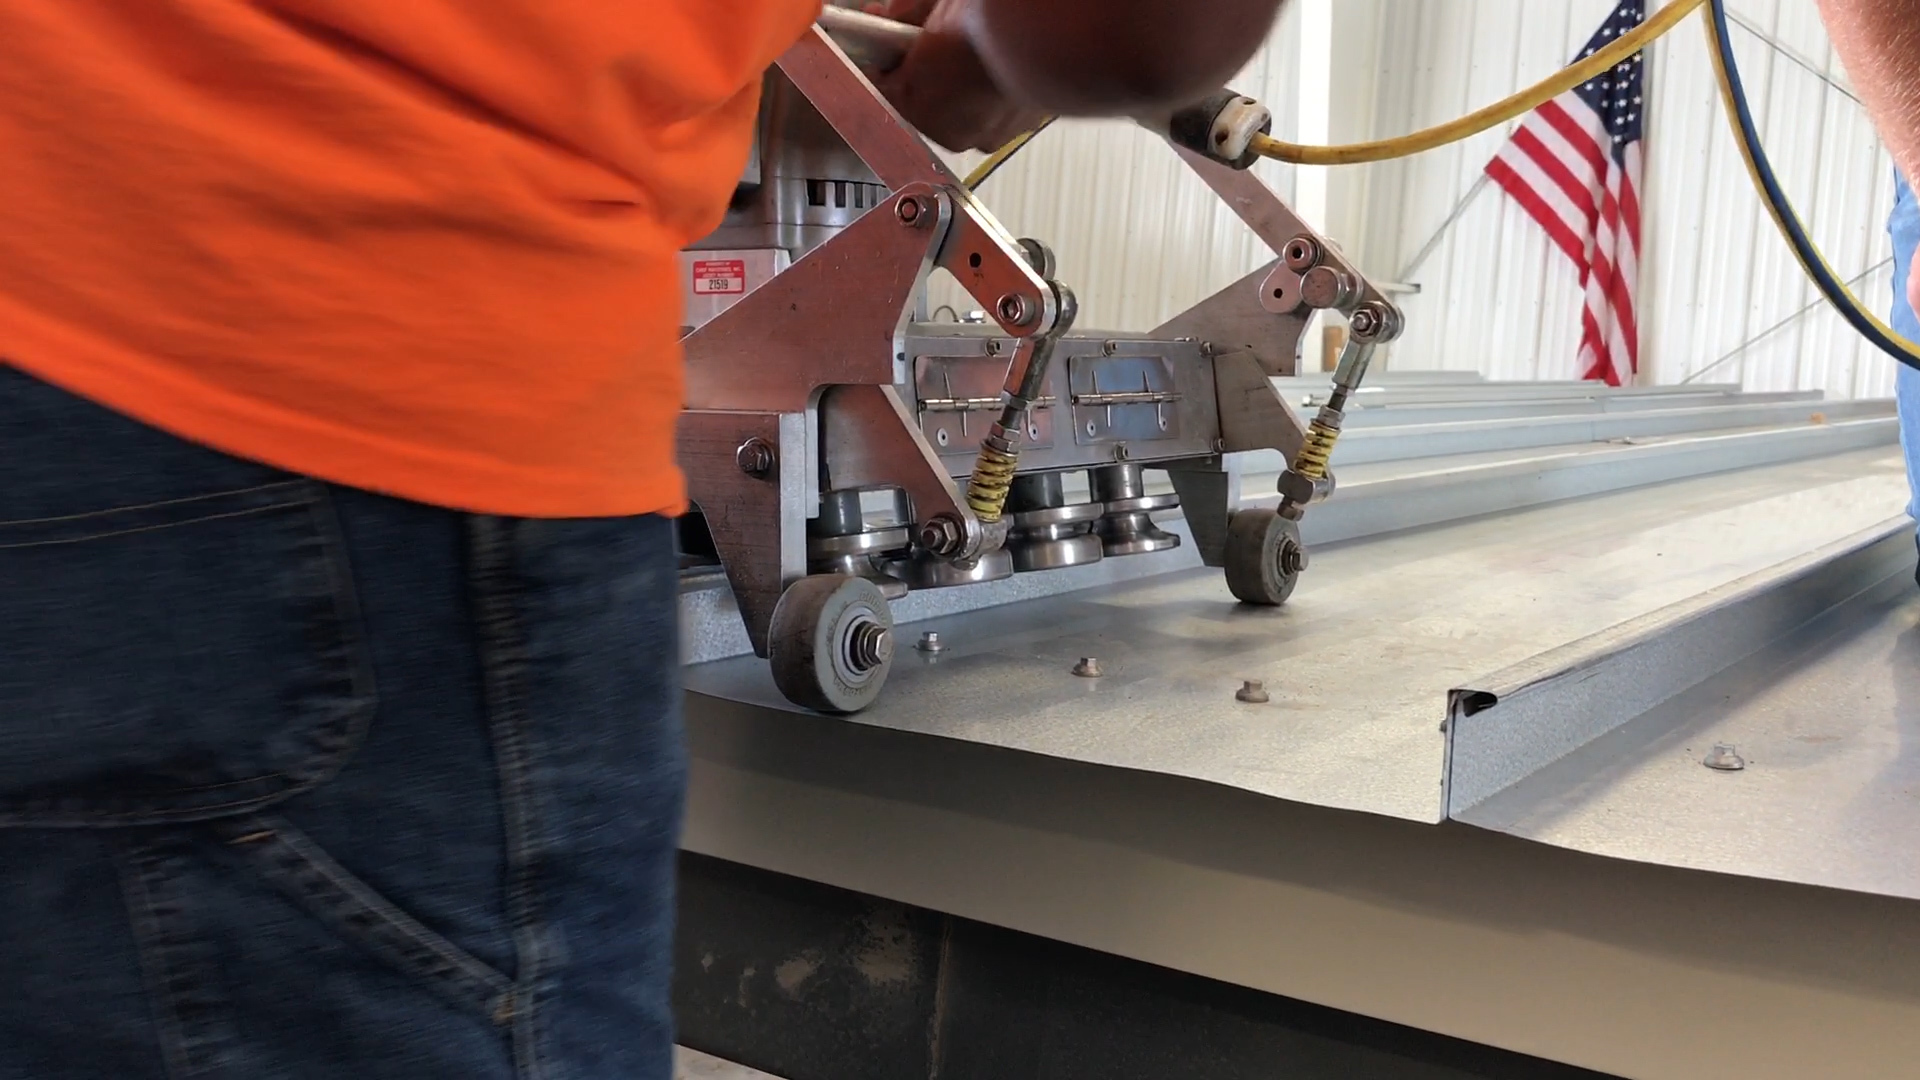
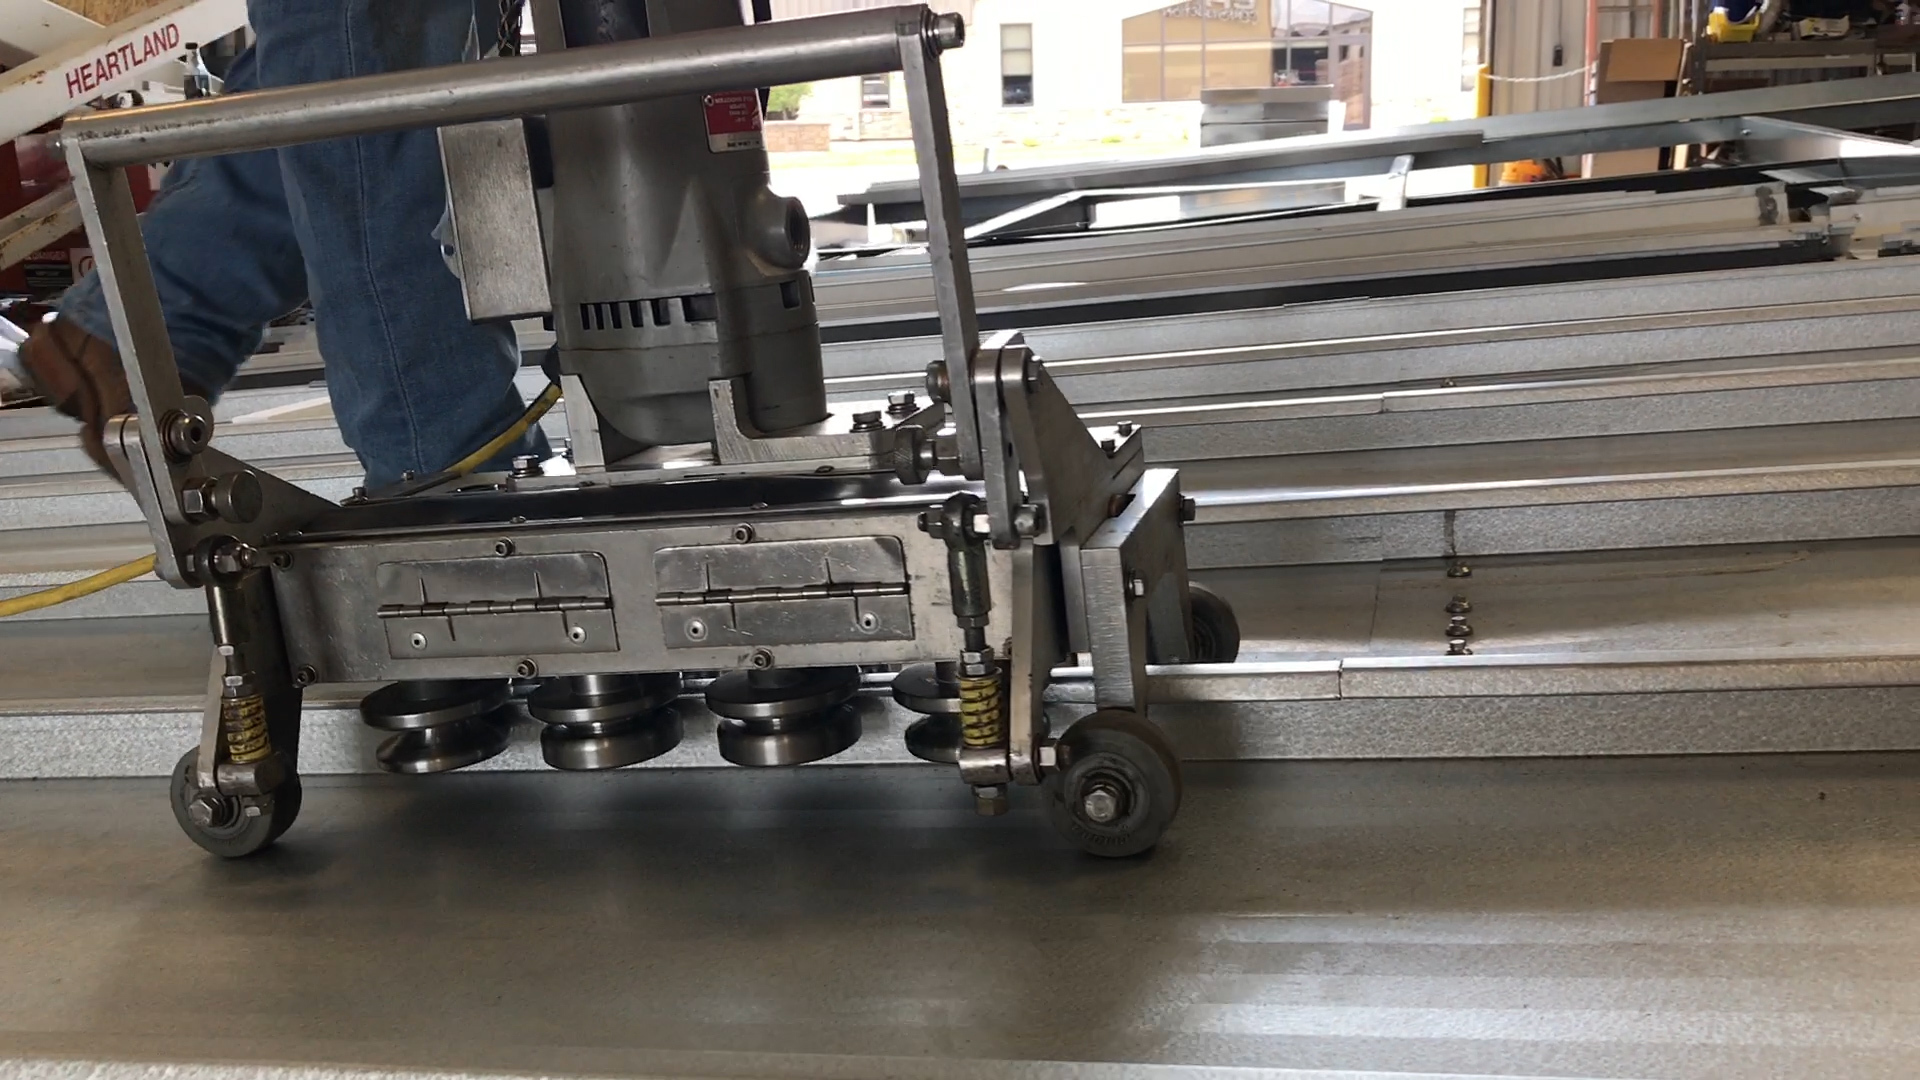
This process entails on-site rollforming with very strict specifications. The roof manufacturer will provide a special seaming machine that matches the roof system panel and finished seam profiles. The correct use of this machine will make or break an entire project. While this task often happens after most workers have moved on to other areas, it is paramount that proper application, operation and supervision of the seaming process occurs.
It starts with a seaming machine designed specifically for the roof product used. Extensive R&D goes into perfecting the seamer roll tooling and manufacturer’s panel configuration to optimize the seam appearance and performance. The roofing manufacturer will typically include statements like “using a seamer that is not setup for x-panel will void warranty” or “using a seamer other than the one supplied for x-panel will void warranty.” It is crucial that the finished seam profile matches specified cross sections. It is advisable that field personnel reference the provided dimensioned profile drawings to confirm the finished seam is within spec. When provided, a factory-supplied go/no-go profile gauge is the quickest way to ensure that this occurs. Check often. The seaming operation should halt, and the panel manufacturer consulted, if proper panel profile is not achievable.
Specifications may require the SSR manufacturer to test its assemblies with the ASTM E1592 protocol. This test method covers the evaluation of the structural performance of sheet metal panels and anchor-to-panel attachments for roof or siding systems under uniform static air pressure differences using a test chamber or support surface. The test results document specific combinations of support spacing, material thickness, screw specifications and panel profile. These prescribed components result in known capacities of that particular, repeatable test configuration. Confirming that your finished seam profile matches the documentation provided is the only way to ensure the system will meet tested values.
Only allow experienced personnel to operate the seamer. The operator needs to pay close attention to how the seamer is operating; making sure that foreign material is not in the seam, i.e., paper from mastics, plastic from insulation bags, etc. Many seamers require prepping the panel with a hand crimper tool to start the machine. This preparation is critical, as failure to align seamer roll tooling properly will cause significant damage to the ribs. Delegating this process to in-experienced operators, or failing to monitor the process, may lead to disastrous and costly results. Remedial steps may be possible, but may require a complete roof replacement.
Preparation Tips
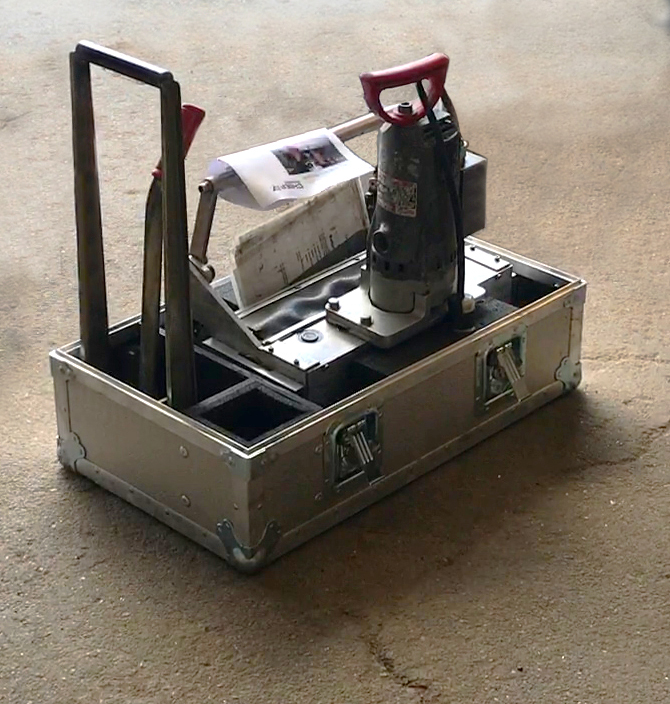
• Inspect the seamer when it arrives to confirm all parts and pieces are present and that no damage has occurred during shipping.
• Measure and confirm panel modularity as roof panels are installed.
• Pay special attention to panel splices. Many layers stack at splices, so proper nesting may require additional effort.
• Prepare seamer-starting points with supplied hand crimpers per the manufacturer’s specifications.
• Consider hand crimping certain points on long panel runs so that panel alignment stays true. Consult SSR manufacturer for specific instructions.
• Clean the panels of any dust/dirt. For colored roofs, this will prevent scratches. For steep roofs, this provides the best traction.
Operation Tips
• Store the seamer in a secure location when not in use. This prevents theft and ensures the machine remains unmolested.
• Visually confirm the roll tooling engagement on the prepared seam prior to powering up the seamer, otherwise damage to the panel will certainly result.
• Continually monitor the seamer during operation. Listen for odd noises or unusual motions as the unit travels along the seam.
• Check the finished seam profile for proper engagement and finished dimensions as you go. The manufacturer’s supplied go/no-go tool is indispensable here.
• Halt the seaming process immediately if evidence of malfunction is present. Contact the manufacturers’ customer service to report the issue. Only under the manufacturer’s direction should your field personnel attempt on-site service to the seamer.
Upon Completion
• Use the same personnel to package up the seamer that first unpacked it to ensure all supplied components are still present. Avoid charges for missing components.
• Return the seamer in the original packaging to avoid damage during the return trip.
• Save and use the supplied return shipping label if provided.
• Return seamers in a timely fashion. Save on daily rental changes, and allow more time for the manufacturer to re-furbish and prepare the unit for the next project.
Dave Bergholz is a customer service manager at Grand Island, Neb.-based Chief Buildings and a member of the MBCEA Board of Directors. For more information, visit www.chiefind.com.