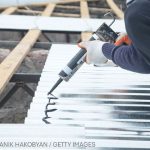
Just take a look around … the use of metal roofs continues to grow and many contractors are installing these systems in a variety of commercial, industrial and residential applications. Engineers have carefully engineered these metal roof systems so they meet local building code requirements. In addition, when contractors fasten them correctly, the roof will achieve the necessary uplift requirements and provide a leak-free roof for many years.
Here’s information on the selection and installation of fasteners
Because the fasteners are integral to the overall performance of the metal roof, it is important that the contractor understands the correct way to select and install a fastener. Equally important is to know that using the wrong fastener or installing it incorrectly can cause the roof to fail.
To help you on your next metal roof installation, I have assembled a few fastening “do’s and don’ts.” It includes information on the selection and installation of the fastener. Please be aware that it is critical you use fasteners specified by the panel manufacturer or design professional to achieve optimal performance.
Selecting a fastener
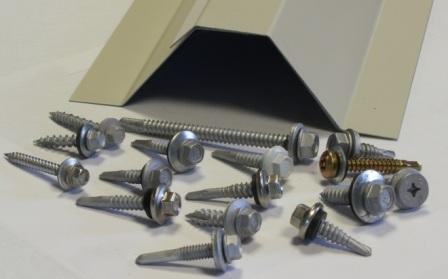
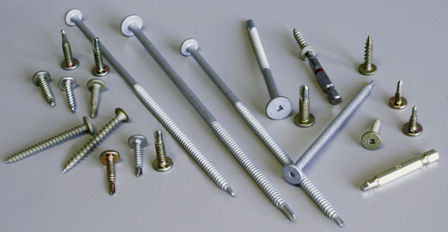
The fastener is a very important component to how well the roof system performs. You should take great care in selecting a fastener that meets the minimum design loads.
• DO select a fastener that is designed for your specific substrate (metal, wood or concrete). Fasteners can fail if they are used in incorrect applications.
• DO select a fastener that meets your uplift requirements. Review your suppliers published pullout loads for the fastener. Ask for independent test reports when loads are not available.
• DO select a fastener that minimizes galvanic corrosion. Chicago-based Metal Construction Association publishes a fastener selection guide for metal roofing.
• DO select a fastener that meets your corrosionexpectations. For exterior and treated wood applications, choose a long-life coated screw, long-life head screw (stainless steel or zinc) or stainless steel.
• DO select a fastener length so all of the threads engage the substrate.
For steel substrates, make sure at least three full threads extend beyond the bottom of the substrate. This will ensure that complete pullout load is achieved. For wood decking, select a screw length so that full threads are embedded. For wood structures (2x material), select a screw length so the threads are embedded a minimum of 1 1/2 inches into the wood.
• DO use a fastener supplier who can assist you in selecting the appropriate screw.
• DON’T use zinc-plated screws for exterior applications unless they have a minimum of 0.0005-inch-thick zinc. Thinly coated zinc plated screws are inexpensive, but they can rust quickly.
• DON’T use a fastener if there isn’t any published technical data. If the application loads exceed the strength of the screw, the screw will fail.
Fastener installation
Installing a fastener correctly will ensure the connection performs as specified. Many tips and techniques are available that will help you with fast, trouble-free installation.
Use an appropriate screw gun with a depthsensing or torque-control feature. This will ensure screws are tightened to the optimal level. Use a variable-speed screw gun. This will allow you to adjust the speed to accommodate hard areas of steel or inconsistent thicknesses. For steel substrates less than 1/4-inch-thick and also for wood, use a 2,500-RPM screw gun. For steel substrates 1/4-inch or thicker, use a 2,000-RPM screw gun. This will reduce the chance of point burnout caused from excessive heat created during the drilling of the screw. For 304 stainless steel screws, use a 1,000-RPM to 2,000-RPM screw gun. This speed will improve the tapping performance and minimize thread rollover.
• DO hold the screw gun perpendicular to the surface. This will allow the screw to drill and tap effectively.
• DO set the magnet located in the nut-setter so that you fully embed the hex of the screw. This will improve the drivability of the screw and eliminate wobble.
• DO use only high-quality nut-setters and insert bits. This will aid in the installation and improve performance of the fastener. Install screws perpendicular to the work surface.
• DO be sure the fastener completes all the drilling before thread tapping occurs. This will eliminate jacking of the panel and point failure.
• DO tighten screws with sealing washers so that the EPDM sealant extrudes to just beyond the outer edge of the metal backing or fl ange. This will ensure a leak-free seal.
• DON’T apply excessive pressure during installation. This can cause the fastener to fail due to excessive heat caused during installation.
• DON’T overdrive screws with sealing washers; this will cause the sealant to extrude beyond the outer edge of the metal backing. This may damage the washer and cause leaks.
• DON’T use worn out nut-setters or insert bits. They can cause the screw to wobble and install inconsistently. It can also damage the paint on the screw or strip out the recess drive.
• DON’T use impact screw guns for installing self-drilling tapping screws. Impact tools can exceed the strength of the screw, causing it to fail. They can also damage painted surfaces and strip-out screws.
Fasteners used to attach a metal roof system are critical to how well the roof performs. By taking great care during fastener selection and installation, you will provide a leak-free roof for many years to come.
Joe Stager, vice president of Triangle Fastener Corp., Pittsburgh, has more than 37 years of experience in the fastener industry with management positions in designing, manufacturing, selling and marketing fasteners to the industrial, automotive and construction industries. For more information, go to www.trianglefastener.com.