Learning rooftop metal screen installation
HVAC units, chillers, air handlers, power exhausts, roof stacks, dumpsters and other various rooftop units (RTUs) serve important functions on rooftops, but they aren’t the most attractive things. With rooftop metal screens, architects have the flexibility to create affordable, elegant, customized screening solutions that integrate with their building design to hide RTUs. However, to do this, the screens must be installed correctly.
A Screen Start
Before starting a screen installation, inspect the roof. Measure for and make a correct assessment of the size and construction material of the screening system. If the amount and size of RTUs are extensive, there are roof screens that can traverse the entire length around the roof.
 |
| Photo courtesy of Industrial Louvers Inc. |
Preplanning a metal screen installation is requisite. “It is important that the fine details get worked out even before you build the screen and ship it to the job,” says Allen Leet, president of Eclipse Screen Systems Inc., Overland Park, Kan. “It’s getting dimensions accurate. It’s getting good information from the contractor in terms of what is to be screened. Most common screen installation errors are a result of the installing contractor not following instructions or providing inadequate documentation or dimensional information during the design phase.”
Ryan Bruce, founder and CEO of RoofScreen Manufacturing Inc., Santa Cruz, Calif., also emphasizes proper preplanning before installation and adds that any roof screen installation must first be correctly designed and analyzed by a licensed professional engineer. “The engineer will ensure the screen is able to withstand wind and seismic loading per IBC and ASCE-7 for the specific site conditions of the project,” he says. “Once those calculations are done, a comprehensive set of shop drawings and installation instructions should be provided to the installers. A roof screen is a critical component of a building and can be a significant safety hazard if not properly installed. Therefore the shop drawings should be very detailed and specific, removing any need to make field judgment calls by the installers.”
Considerations
Detailed installation methods vary with each metal screen system. Some screen systems require attachment to the roof and others can be attached entirely to the RTU. This is an especially important consideration since standing seam roof systems experience thermal roof movement.
 |
| Photo courtesy of Eclipse Screen Systems Inc. |
“Systems that require supports attached to the roof should utilize roof curbs or pipe boots to accommodate appropriate attachment to the building structure,” says Greg Conrad, Midwest business manager, KCC International Inc., Louisville, Ky. “Utility clamps can provide an effective alternative means of attachment to the roof system. Generally speaking, metal screen systems that attach only to the roof curb are preferable for use on a standing seam roof. The biggest error made with these systems is not adding the weight of the screen system to the weight of the unit sitting upon the roof curb. The additional weight of the screen system will often necessitate the use of a double curb to adequately allow thermal roof movement.”
An equipment screen’s attachment varies depending on the structure it is going on to. “This structure may consist of vertical posts alone, however most commonly has some horizontal supports-top and bottom-spanning between the vertical posts,” says Brett Reinhardt, director of business operations, Industrial Louvers Inc., Delano, Minn. “Horizontal louvered equipment screens typically have a vertical angle or channel supports. If only vertical steel is provided, the vertical angle/channel supports can straddle the steel and be fastened via mechanical fastener. If horizontal steel is provided, the vertical screen supports may be attached using clip angles via mechanical fastener. Horizontal steel also allows for corner sections to be installed similarly to straight sections and keeps costs down. Vertical louvered screens have horizontal angle supports. In these situations it is best that the horizontal angle supports be attached to vertical steel supports via clip angles.”
During the submittal phase, Reinhardt typically requests the steel drawings illustrate the support structure so his company can size the sections appropriately to minimize any interference in the field. The installing contractor is then responsible for verifying the dimensions in the field.
Curb-mounted Installation
When installing Eclipse metal screen systems around rooftop HVAC units, Leet says the first step is to fasten structural clips to the correct locations of the roof curb, which hold and secure the whole screen system to the curb. “Without the clips, the screen would just sit on the roof,” he says. “This way it is suspended from the curb and everything is cantilevered off the curb. The curbs’ height is very important. If the clips are too long or the curb is too short, it causes problems. That needs to be coordinated.”
The next Eclipse installation step involves outrigger members that slide through structural clips to form the external framework of the screening system. Horizontal panel support members are put in with bolts and fittings that secure everything together. “After that you’ve got the basic framework all done,” Leet says. “It’s just a matter of screening the panels onto the exterior and mounting the pre-hung hinged door assembly. There is nothing required to be fabricated at the site or by the contractor. All the hardware is there.”
 |
| Photo courtesy of Eclipse Screen Systems Inc. |
For this type of installation, Leet stresses the importance of the relationship of the top of the curb to the finished roof. “Clips could hang down too low and hit the roof,” he cautions. “That’s a detail that needs to be addressed up front as well. The other thing is roof slope. If the roof pitch went up a certain way from our screen, we want to make sure we still have the proper clearance, so we don’t damage the roof. We want to be totally off the roof and not touching.”
Roof-mounted Installation
Installing an equipment screen that mounts to the roof requires more planning and a deeper understanding of the structure. The installer must be able to make the attachments align with the structural members in the roof framing and follow specifications outlined in the engineering report. Roof-mounted screens also require coordination with the roofing contractor to properly seal the penetrations.
Bruce says for roof-mounted equipment screen installation, the first step is locating the attachment points for the framing. “The point loads from equipment screen attachments are too high for mounting directly to decking, with the exception of structural concrete decking,” he says. “For this reason, the attachments must be located over and attach into structural members in the roof framing. If structural members are not located in an area where an attachment needs to be placed, additional structural blocking must be installed for support.”
Once the locations are identified, Bruce says the following installation steps are:
• Install the mounting footers according to engineering report specifications.
• Seal the penetrations.
• Use laser levels and string lines to erect the frames, making them level across the roof.
• Install the metal panels on the screen face.
• Trim it out with caps and corners.
Regardless of the screen installation method, all RTU service doors and panels, disconnect switches, and other components and instrumentation must not be impeded or blocked. Make sure they are accessible to perform required equipment maintenance. “One thing that is really important is the RTU’s serviceability,” Leet says. “We maintain enough clearance so you can always open the service doors and always walk around the perimeter of the unit.”
After installation, inspect the screen. Are all its assembly screws and bolts tight? Vacuum or sweep all metal shavings left over to prevent rust from forming. Ensure all the gates and panels open and close properly.
Sidebar: Screen Installation Concerns
The most significant problem I have seen is the use of pressure-treated lumber to build and attach screen walls to a pre-engineered metal deck. The chemicals used in the pressure-treating process, most predominantly copper, will cause an adverse reaction and rapid deterioration of the roof panels. Another concern is having the installation completed by the building erector, as most mechanical contractors do not have the experience with the proper methods and fasteners required to make a watertight attachment. The last concern is specific to standing seam roof systems that are intended to move with thermal expansion. An inexperienced installer might put a fastener through a purlin and lock the panel, which could lead to significant problems.
George McGuire, consultant, Thybar Corp., Addison, Ill.
Sidebar: Seven Steps to Rooftop Screen Installation
1. Determine the load that will be on the panels due to wind pressure and wind suction. This is determined by calculating the pressures using factors such as wind speed, height, length of wall, building classification and exposure category.
2. Design the panels to determine how far apart the framing members can be spaced. Special design requirements are required for perforated panels since the holes reduce the panel strength.
3. After the pressures have been determined, you then have the information required to design the framing to withstand the calculated pressures.
4. When designing the framing, determine the metal panel to be used for the wall. The strength of the panel may dictate the spacing of framing that the panel will be attached.
5. When installing the framing members that will support the metal panels, be sure that any penetrations through the roof are sealed properly to ensure no water infiltration.
6. Follow the fastening schedules provided by the metal panel manufacturer for proper placement and number of fasteners.
7. Use trims such as J-Channels to give a finished look at panel edges; this would be at the discretion of the owner/designer.
Information provided by Mark Mullins, product training manager, Fabral, Lancaster, Pa.
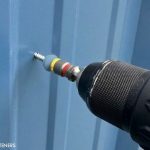
Sidebar: Screen installation tools
1. 200-inch tape measure
2. String line
3. Levels (large one and 6-inch “torpedo”)
4. Construction crayon
5. Ear plugs
6. Safety glasses
7. Heavy-duty extension cords
8. Large vise-grip clamps
9. Open end and socket wrench set
10. Power drill
11. 1/2-inch drive power impact driver
12. Cordless drill/driver gun
13. Self-leveling laser level with tripod.
14. Power skill saw with metal cutting blade
15. Reciprocating saw with metal cutting blade
Information provided by RoofScreen Manufacturing Inc.
 |
| Photo courtesy of RoofScreen Manufacturing Inc. |